Training: Health Care Providers
Treatment/Testing prior authorization requests (PARs) are replacing paper forms Attending Doctor's Request for Optional Prior Approval and Carrier's/Employer's Response (Form MG-1), Attending Doctor's Request for Approval of Variance and Carrier's Response (Form MG-2) and Attending Doctor's Request for Authorization and Carrier's Response (Form C-4AUTH). These forms can no longer be used to request authorization for treatment or testing. Health care providers will not need to know what type of PAR to submit, instead they will answer questions based on the treatment/testing needed and the type of PAR will be determined based upon the information they provide. Treatment/Testing PARs submitted through OnBoard will automatically be routed to the appropriate claim administrator for review.
Submitting a Treatment/Testing PAR
Provider delegates can draft and submit prior authorizations requests (PARs) on behalf of the health care provider. If the provider wants to review the PAR before submission, a delegate may save it as a draft. To learn more about the role of the provider delegate, visit the Medical Portal Access and Administration: Health Care Providers page.
Health care providers can draft and submit PARs created by themselves, or review and submit PARs that are drafted by their delegates. Any PAR drafted by a delegate will appear on the health care provider's Draft eForms tab for final submission.
Creating a PAR
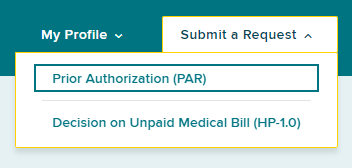
To submit or draft a Treatment/Testing PAR, including MTG Confirmation, MTG Variance, MTG Special Services, Non-MTG Over $1,000 and Non-MTG Under or = $1,000 PARs, select the Submit a Request button on the top right of your dashboard.
Select Prior Authorization (PAR).
Requestor information
Provider name
A provider's name will be selected automatically if they are submitting on their own behalf, or if a user is only delegated to submit requests on behalf of one health care provider. If a delegated user submits requests for multiple providers, they must select the provider's name from a list of providers.
Provider license
If the provider only has one medical license, the form will automatically fill in the license information. If there is more than one medical license, select the correct license from the drop-down list.

Select the Claim Search button.
Request Items
After conducting the Claim Search, select the Treatment/Testing PAR category.

Complete the additional fields that appear for the Treatment/Testing category.
-
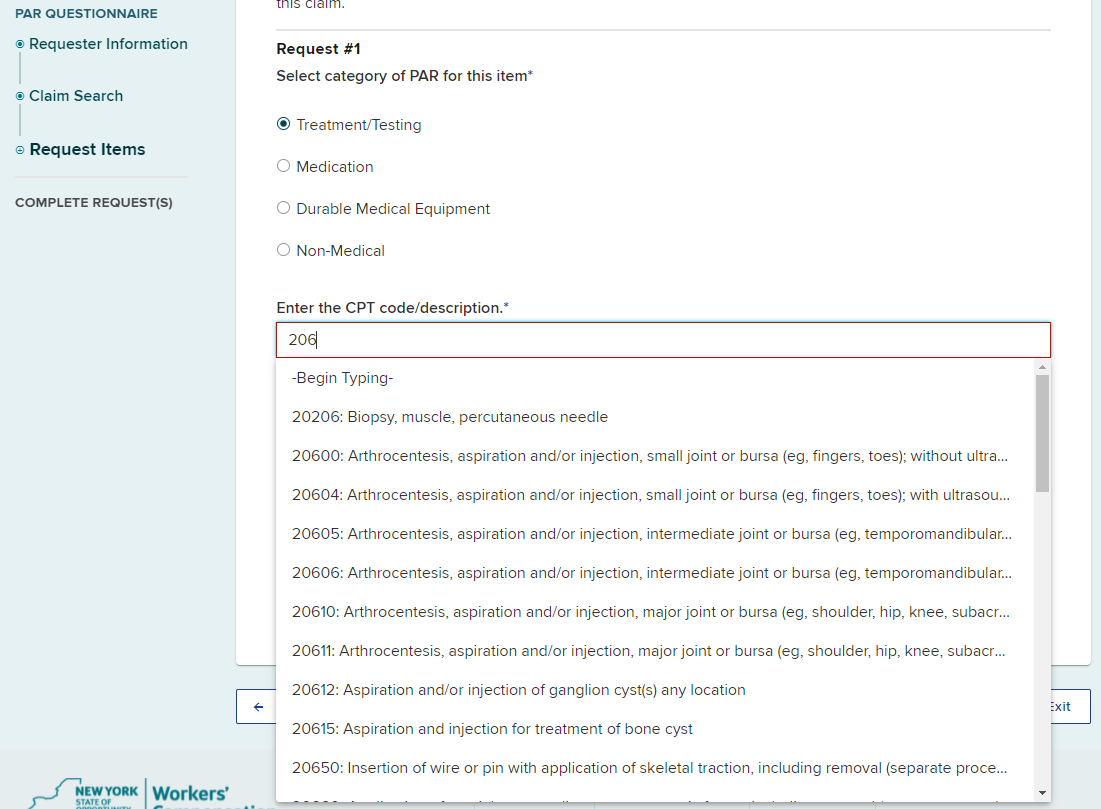
Begin typing at least three characters of the CPT Code or description in the CPT Code/Description field and then select the correct CPT Code from the list.
- Select the MTG Site from the drop-down options. If there is no MTG site associated with the PAR, select None.
- Begin typing at least three characters of the Medical Treatment Guide Reference and then select the correct reference from the list.
- Enter the Body Part.
- Select the Side of Body, if applicable.
- If appropriate, select if the treatment/testing is addressed or consistent with the MTGs.
- Select Save.
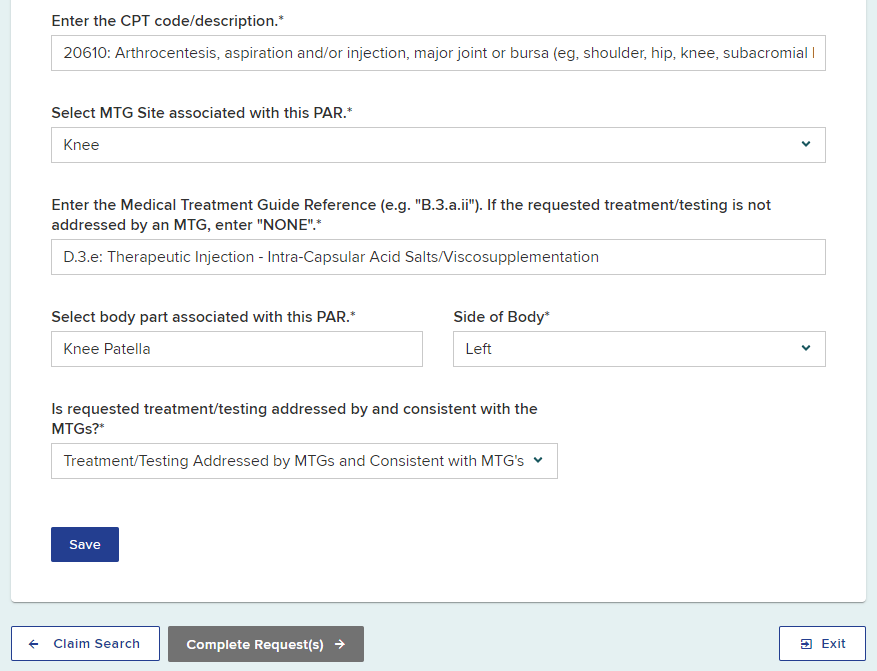
The type of PAR will be determined by the information provided. This example generated a MTG Confirmation PAR.
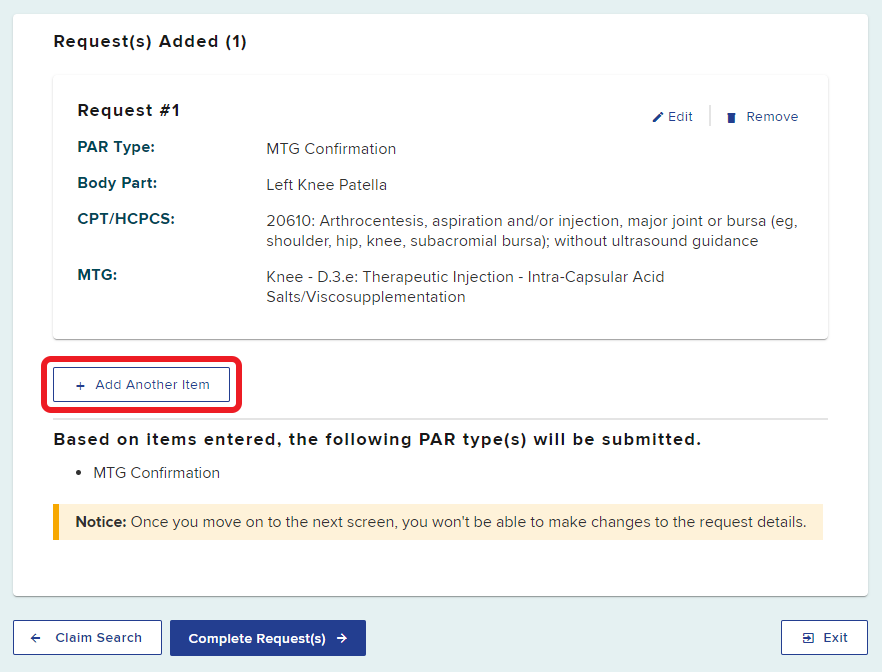
If multiple prior authorization requests are being submitted for the patient, they can be added by selecting the Add Another Item button and selecting the appropriate PAR type.
The following examples will show how to submit multiple types of Treatment/Testing PARs for a patient.
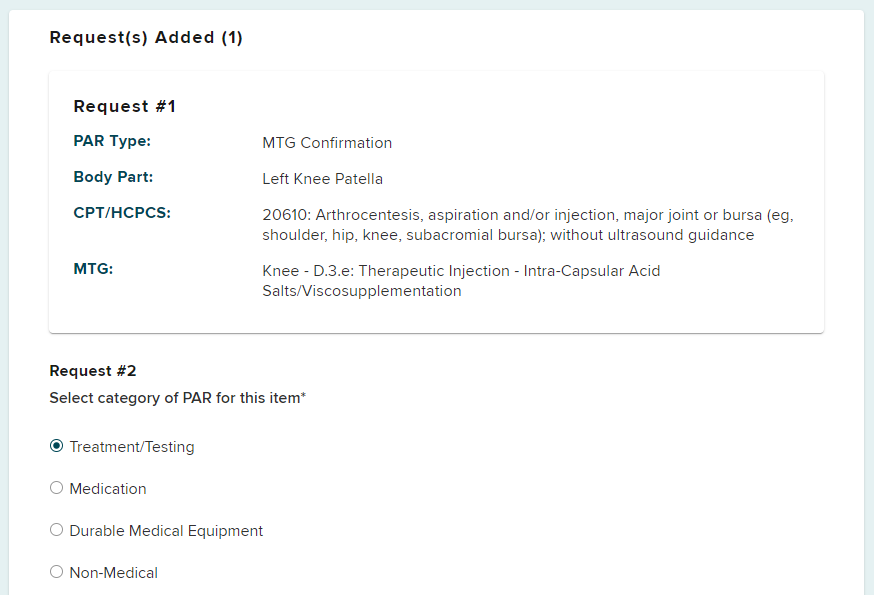
After selecting Add Another Item, the second request category PAR will show. Select the next category of your submission. In this example, we will be adding an MTG Variance.
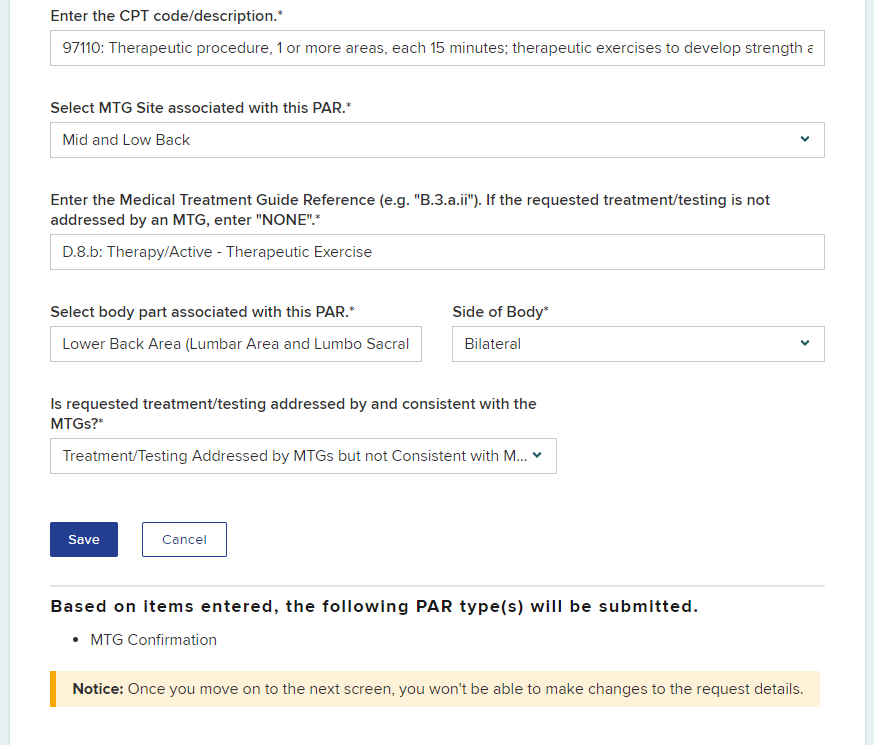
Answer the required questions and select Save.
The second request is now added to the submission as Request #2.
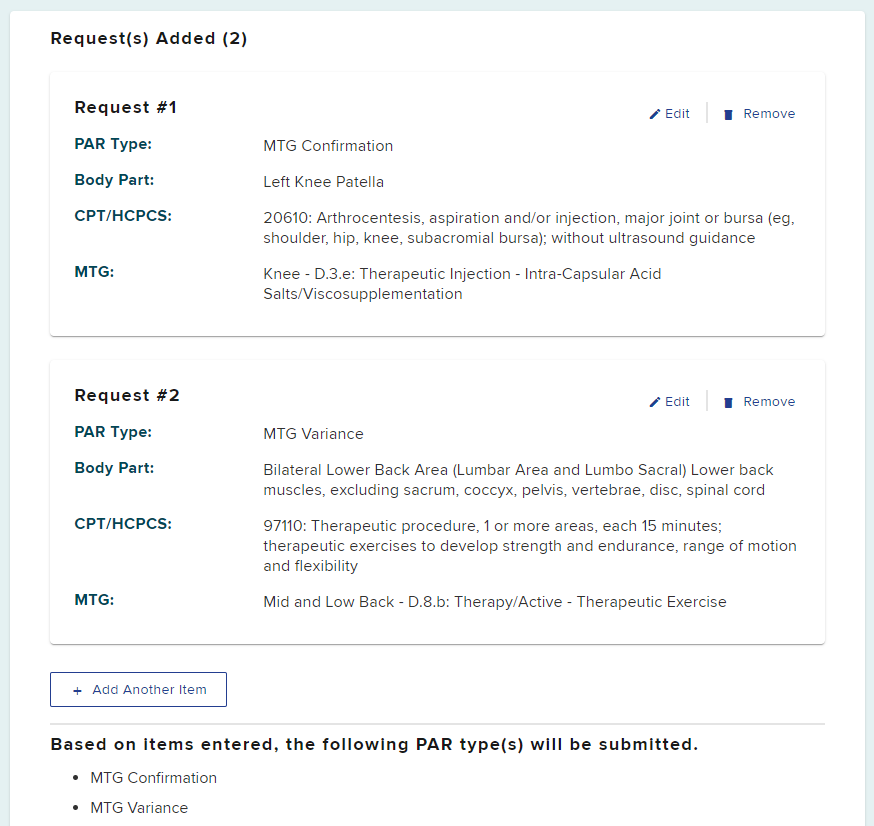
Select the Add Another Item to continue adding requests for the patient to your submission, enter information in all fields that appear.
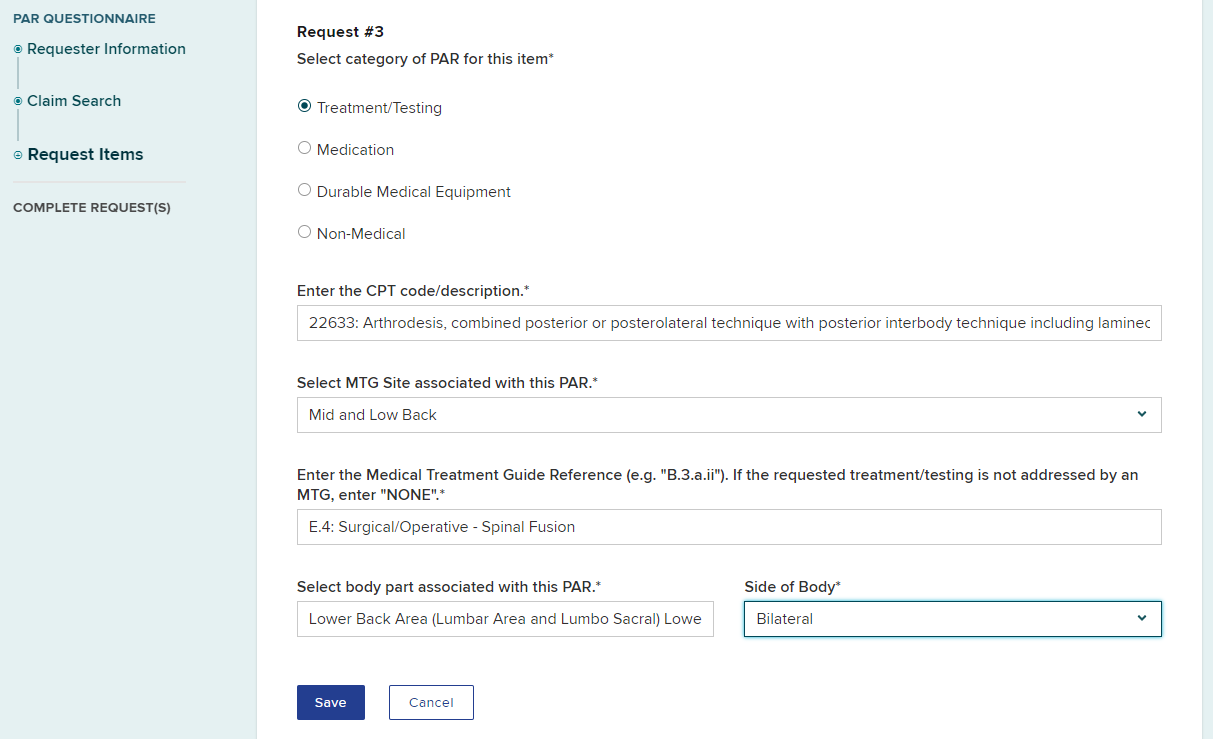
A third prior authorization request of MTG Special Services has been added to the submission.
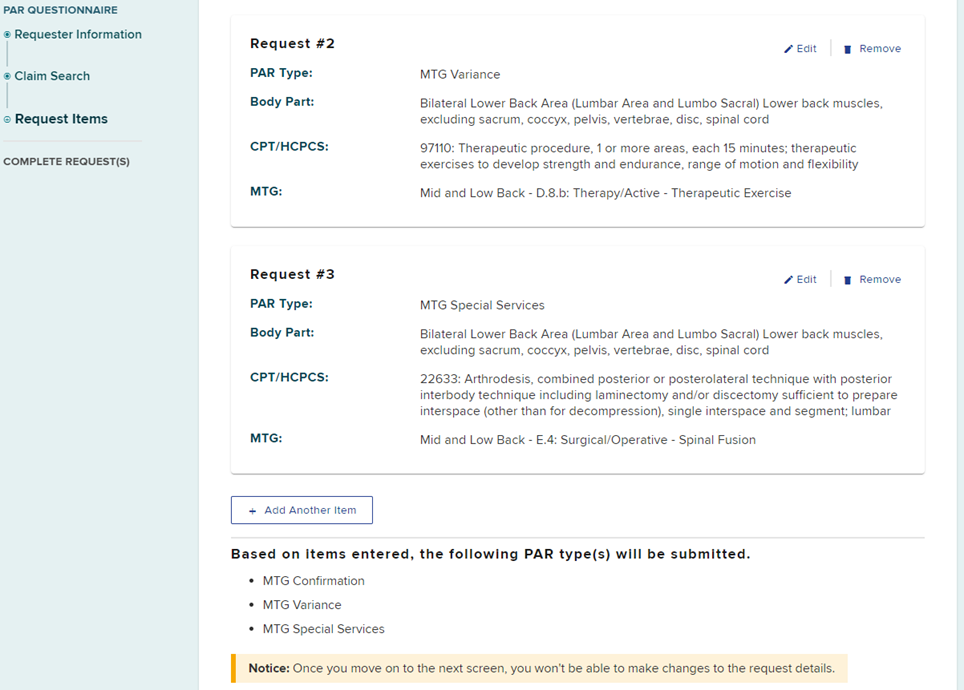
For our example, a fourth item, another MTG Variance, was added to the request.
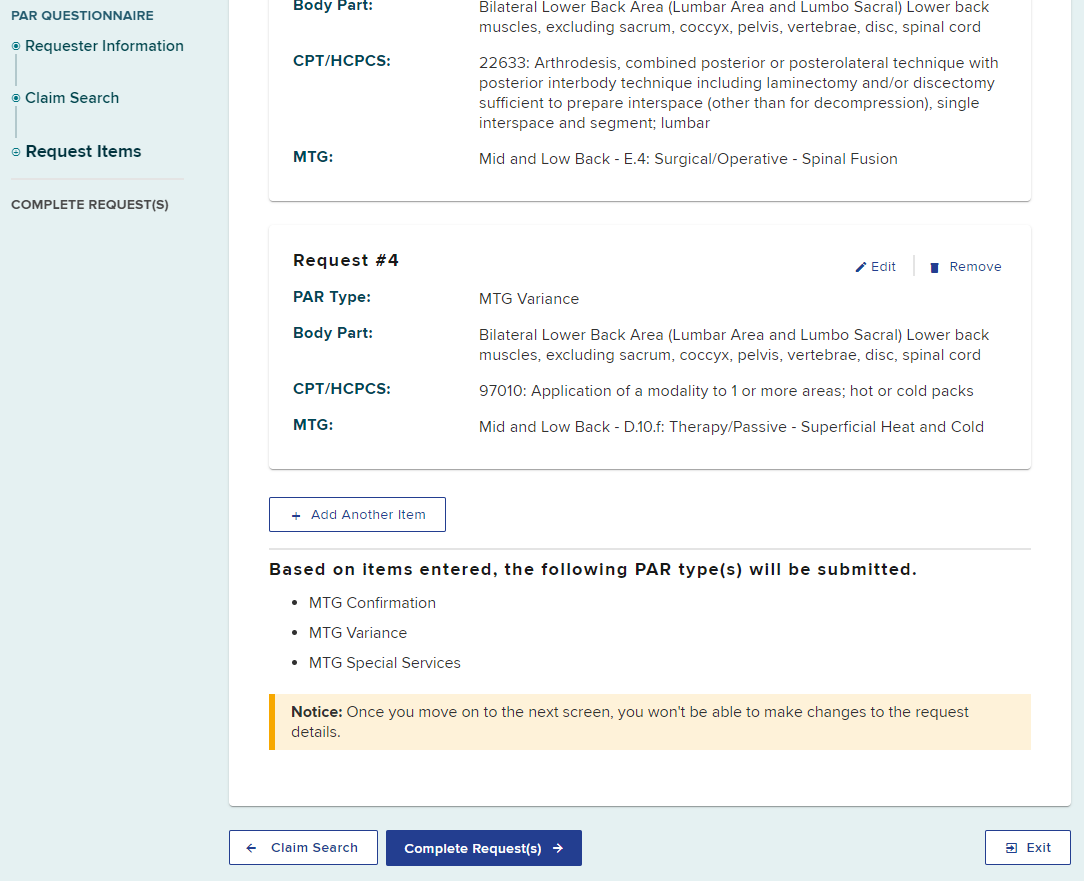
Once you move to the next screen to complete the request, you will not be able to make changes to the request details. Confirm all items are added and correct. If you need to change any information previously entered, select the edit button. If you do not want to submit a requested item, you may remove it.
Select the Complete Request(s) button
Complete Request
Because our example included multiple PAR types, you will be prompted to complete and submit each PAR separately, beginning with the first requested PAR type.
First, the MTG Confirmation item needs details added. Select Add Details button to continue.
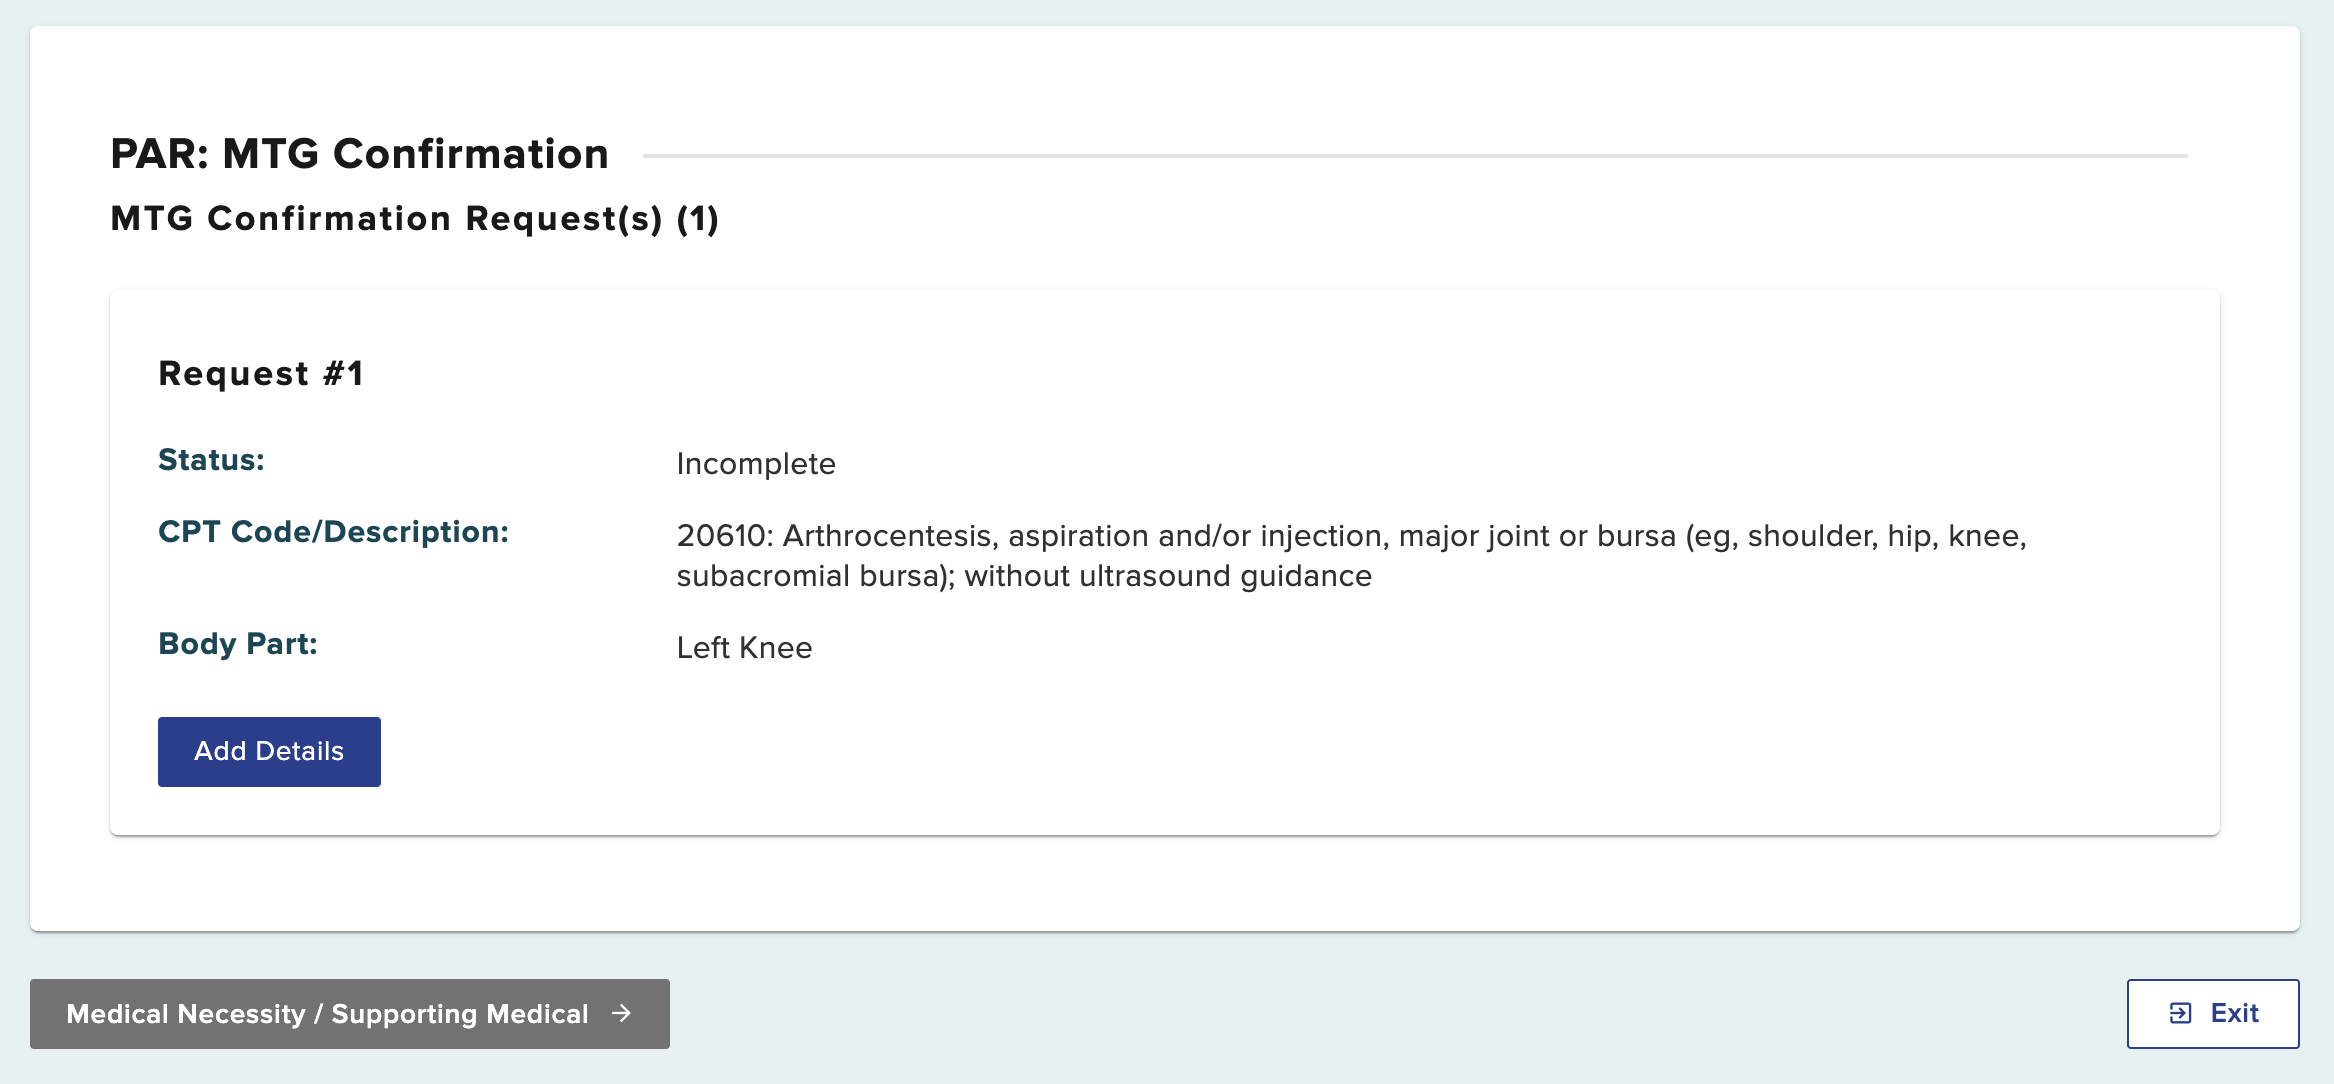
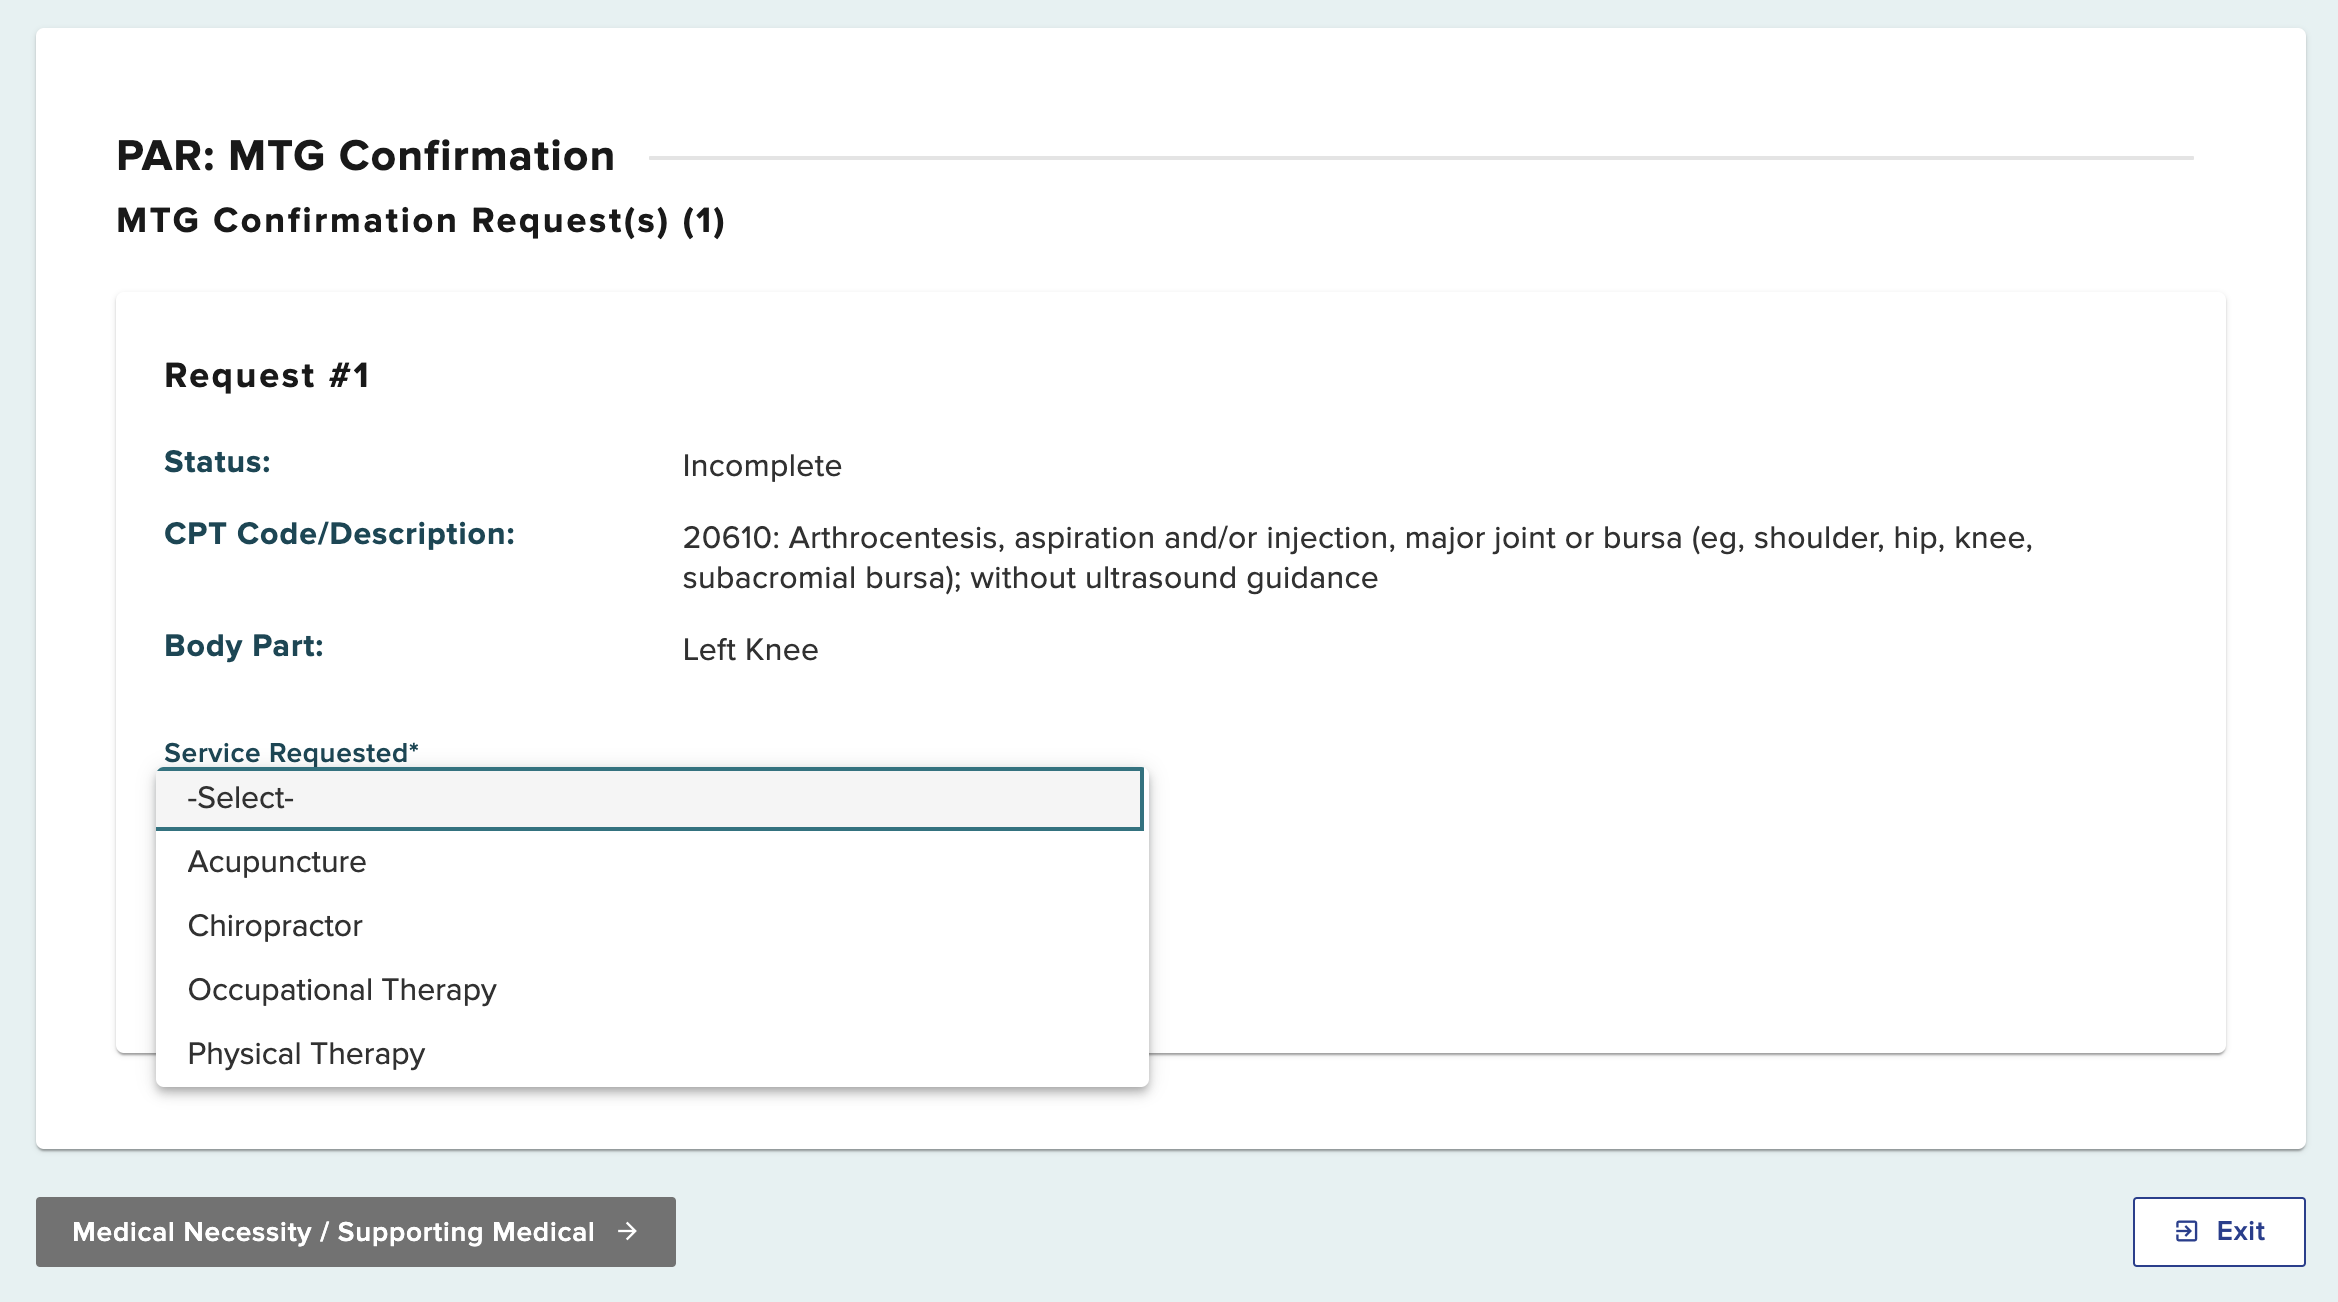
Select the type of service you are requested for this item.
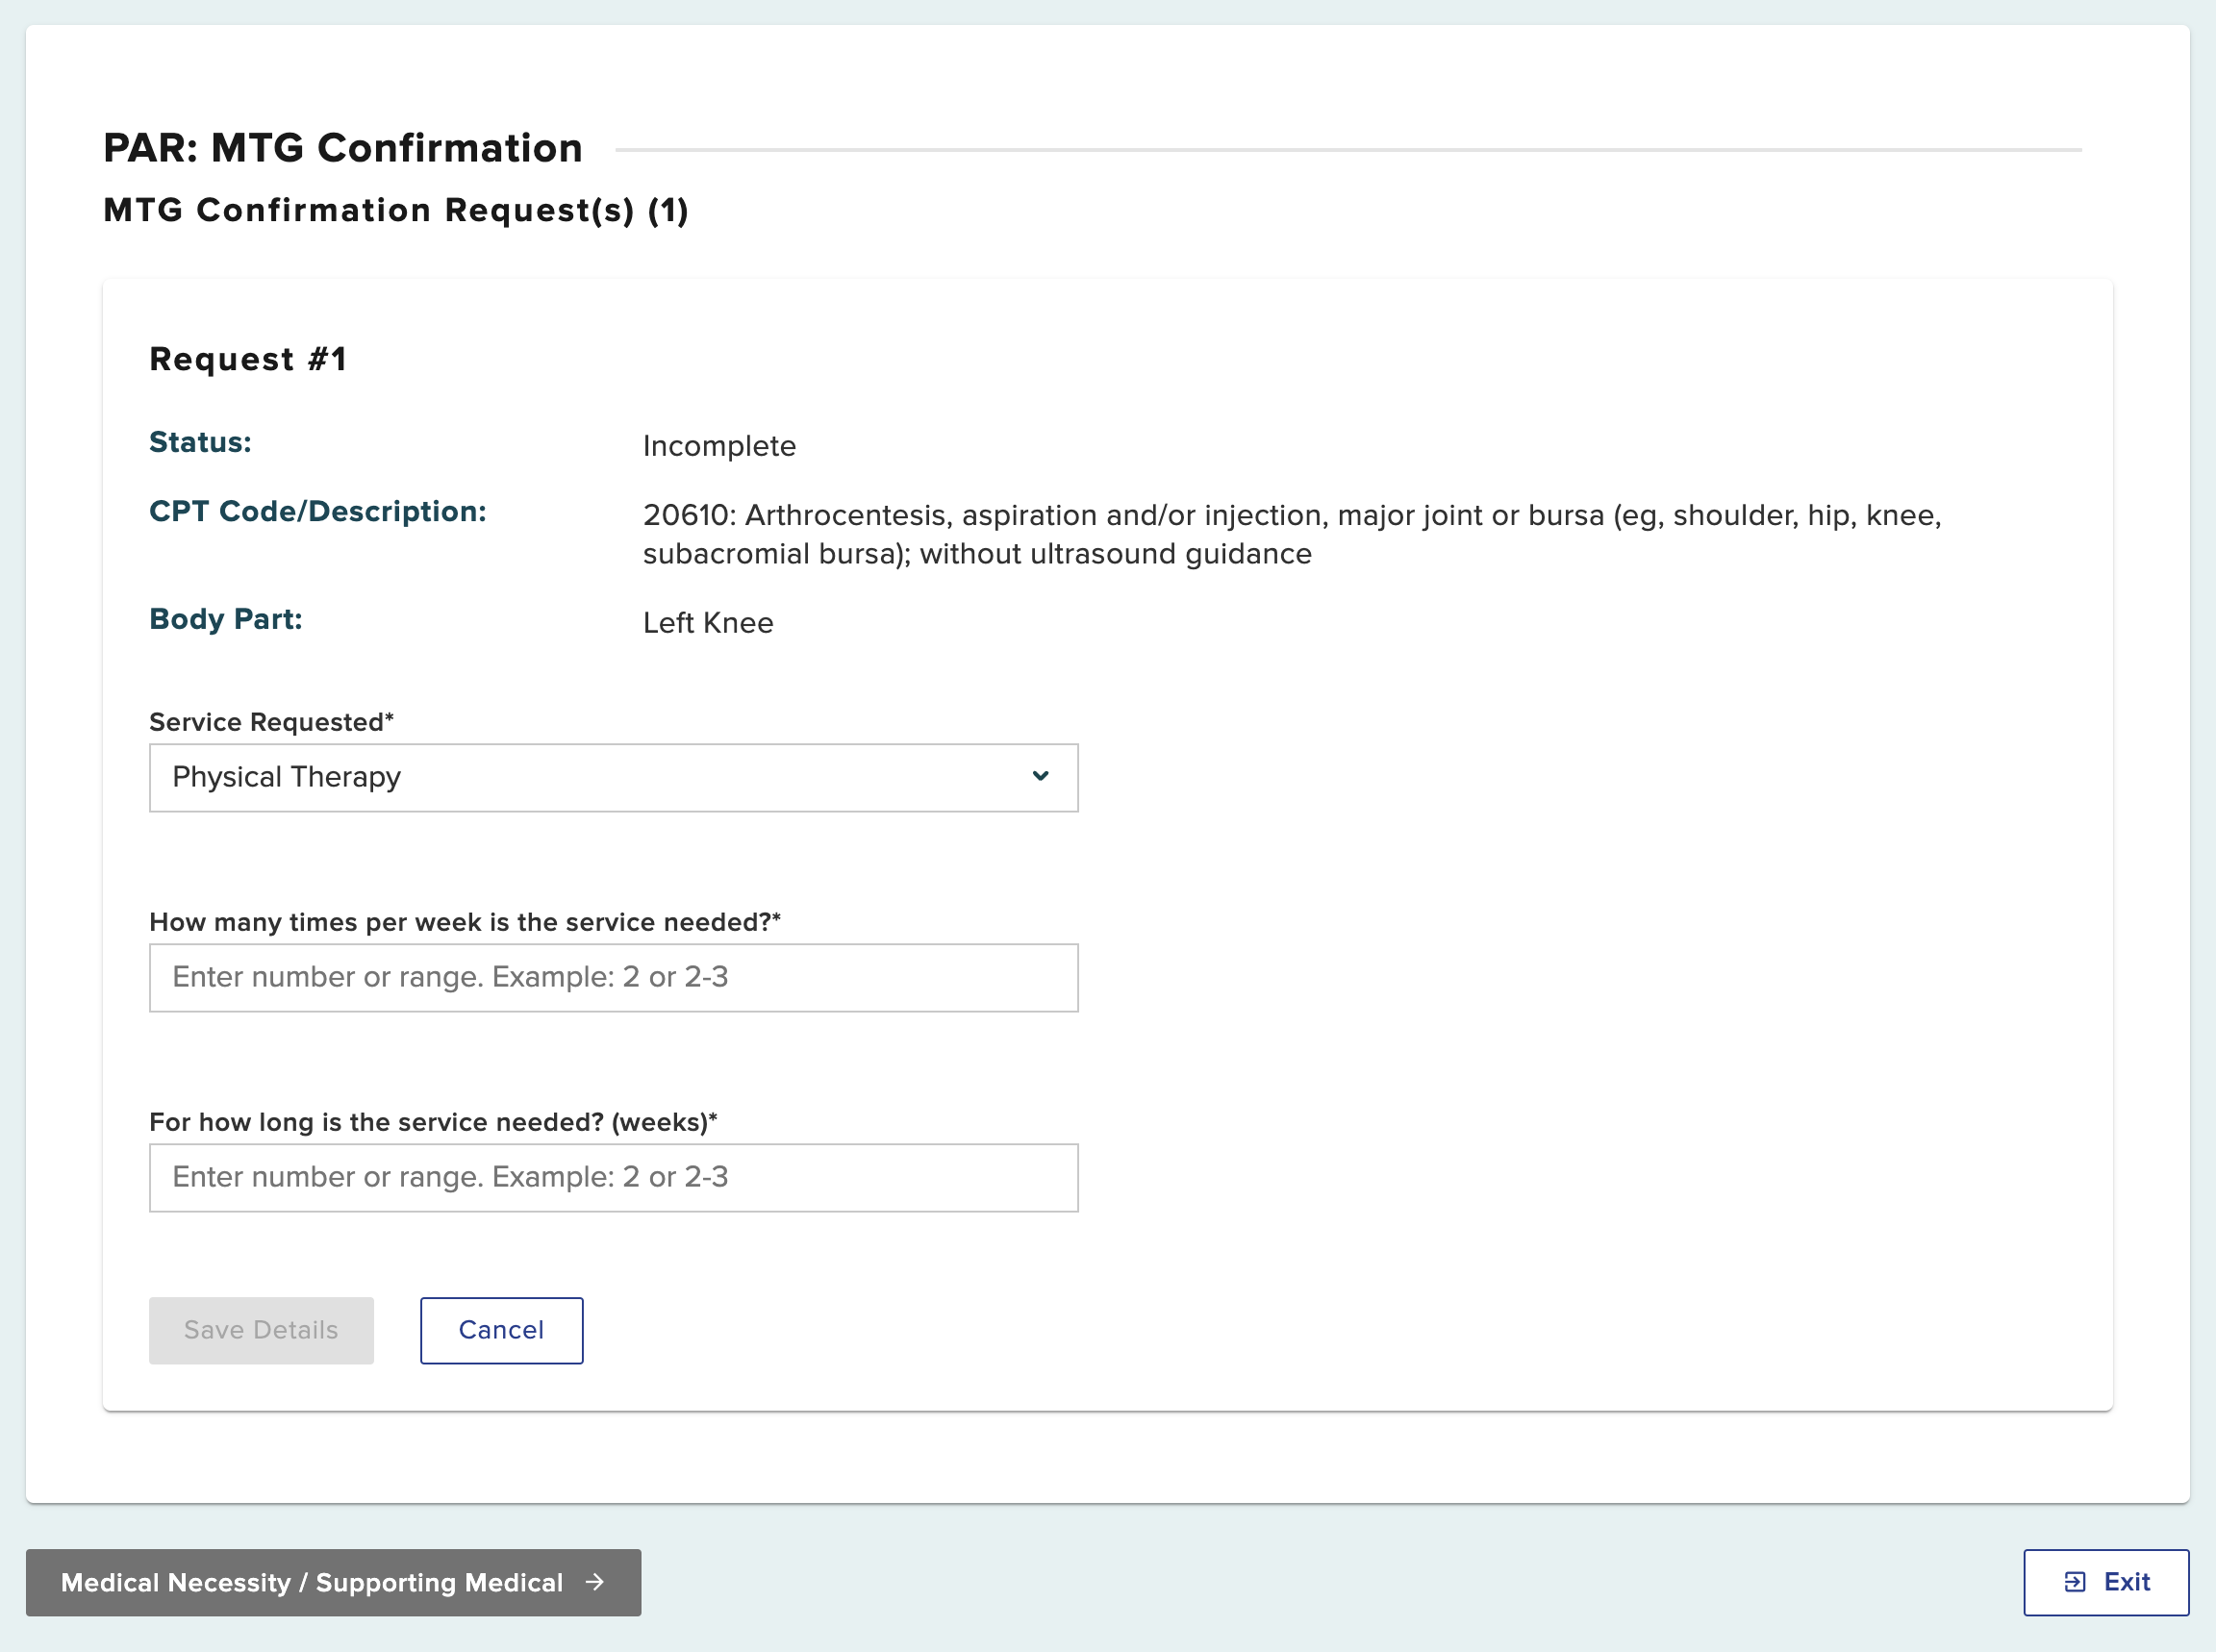
After selecting the service requested, additional fields will show.
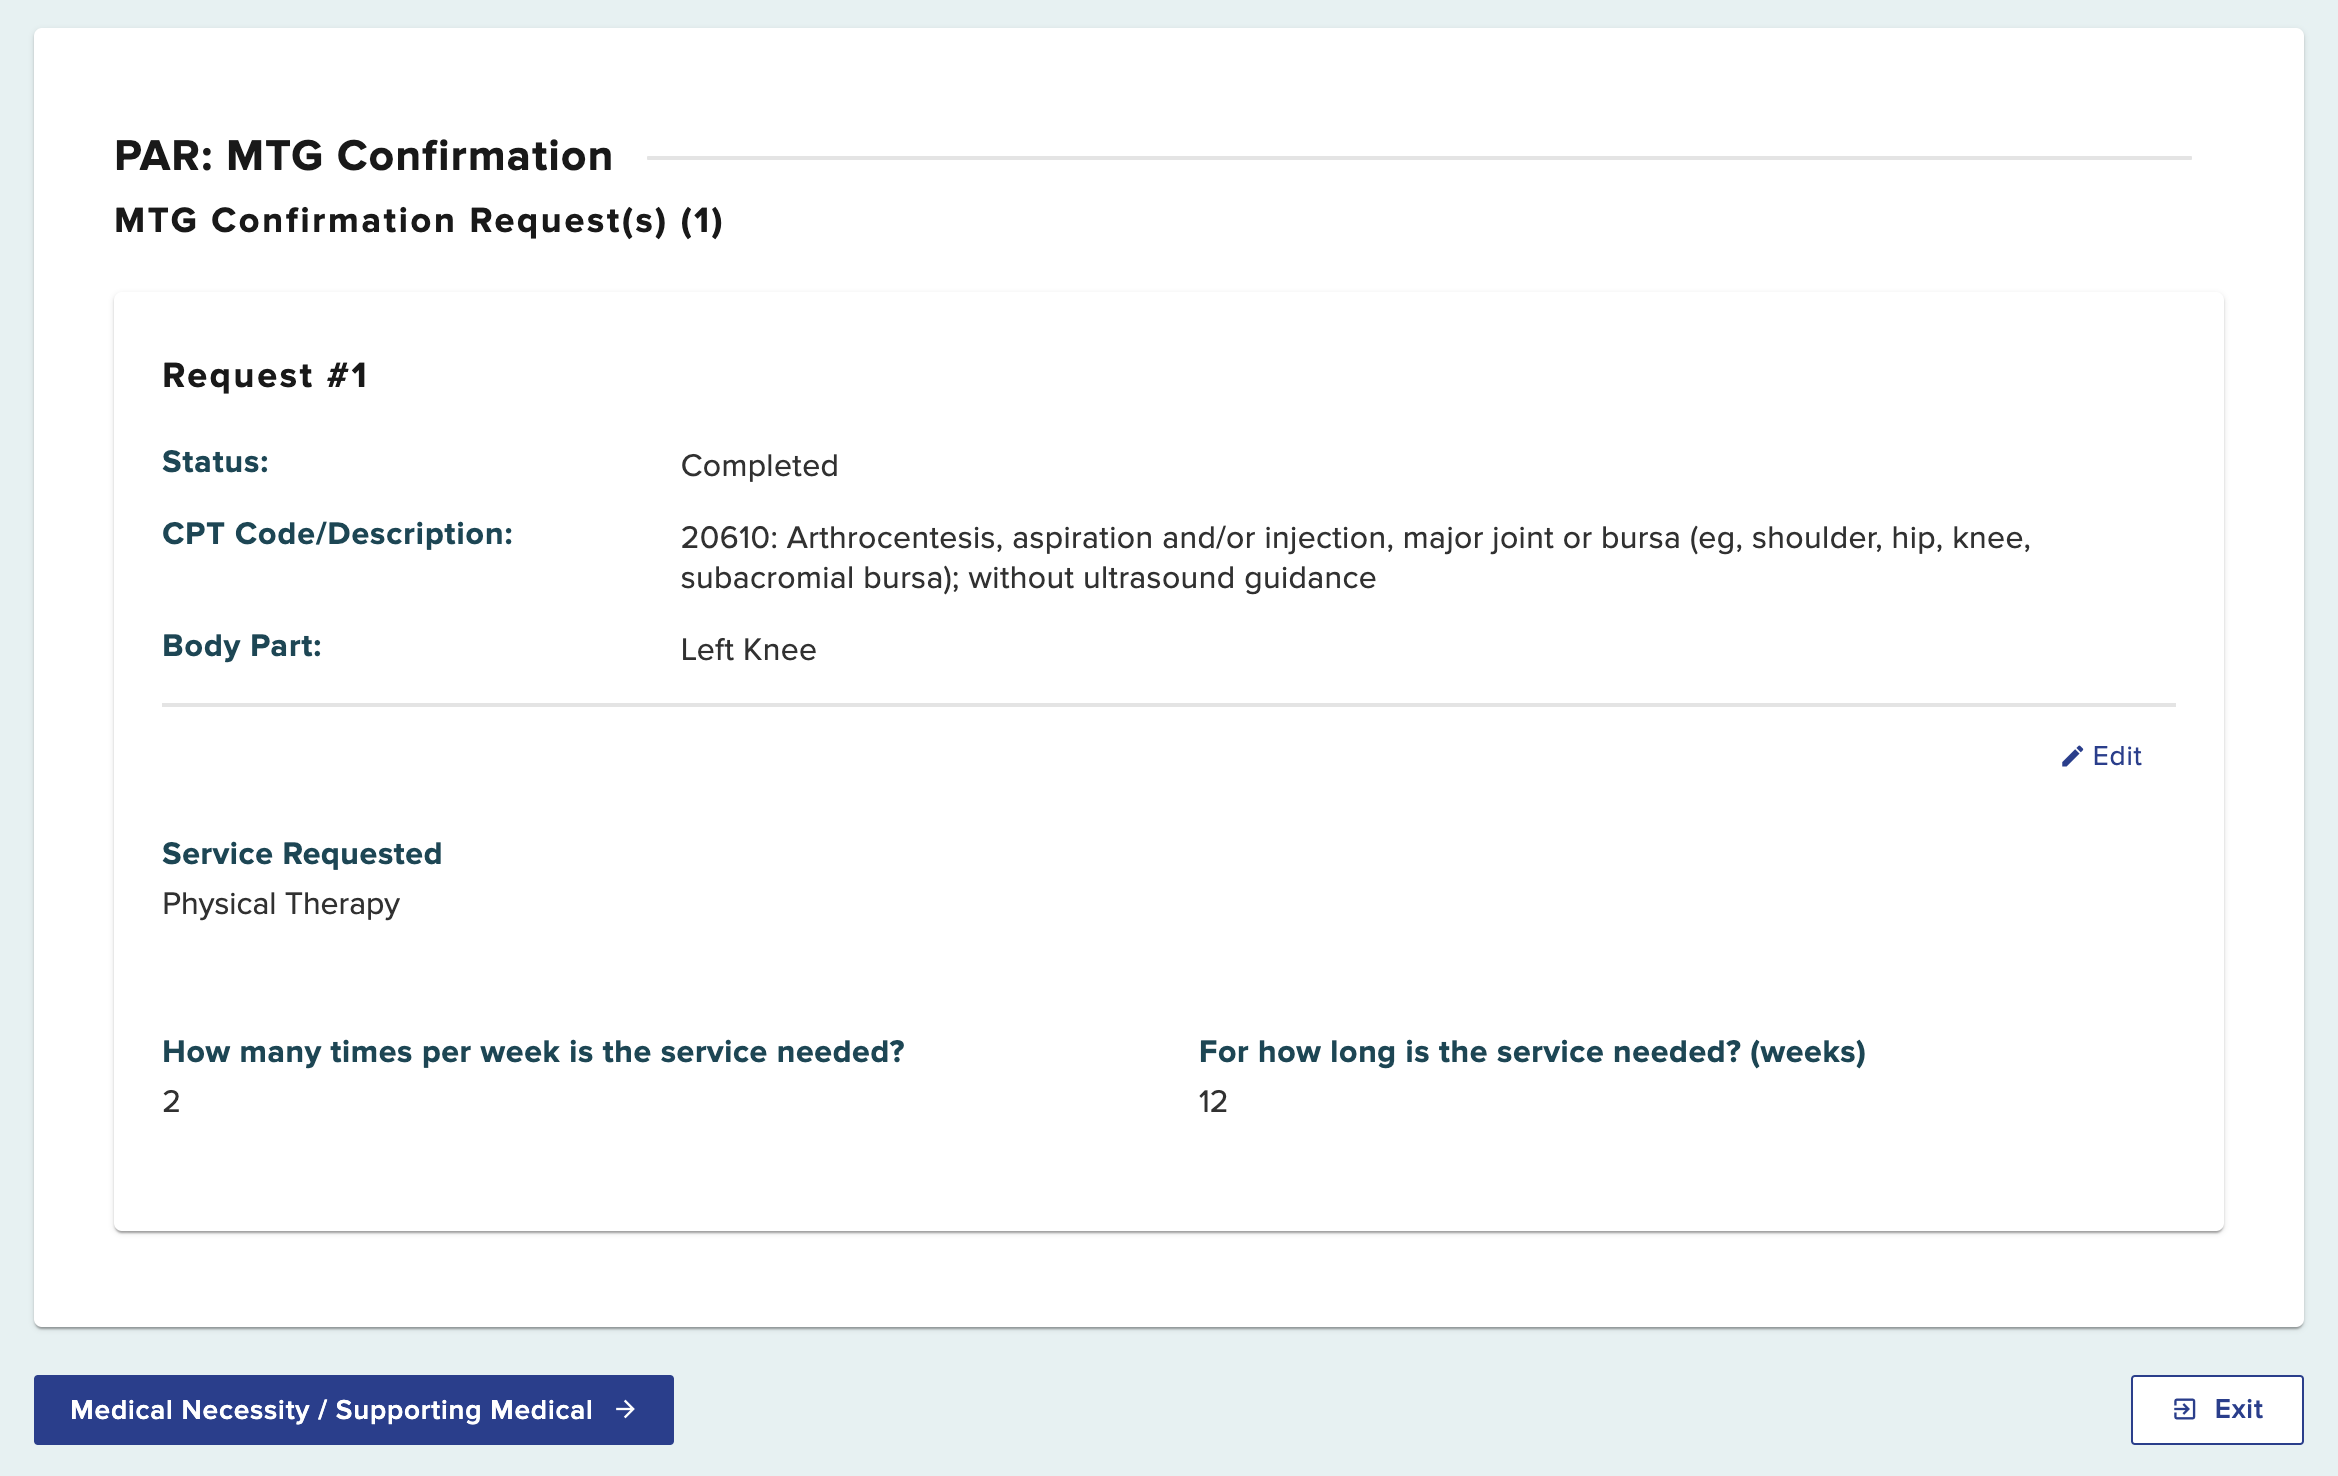
This will complete the additional details needed to complete the request. Continue by selecting Medical Necessity/Supporting Medical.
You can save as a draft by selecting the Save as Draft button on the top right of the page. Your draft will be saved under the Draft eForms tab in your dashboard, where you will be able to select it and continue completing the request at a later time. If you entered information for multiple PAR types, each PAR will be saved as a separate entry in the Draft eForm queue.
Draft eForms are removed if they are not submitted within 30 days from the date they are created.
Statement of Medical Necessity
Every PAR submission requires a statement of medical necessity providing all relevant clinical information to support the request. If your request includes therapeutic modalities (example: PT, OT, Acupuncture, Chiropractic), please include the specific frequency and duration of the requested treatment in the Statement of Medical Necessity field. If your request includes spinal levels, please include the specific spinal levels applicable to the request in the Statement of Medical Necessity field. Include narrative(s), progress notes and other supporting documentation (e.g., symptoms, surgery date if applicable, justification for the equipment, etc.), any contraindications, and if applicable, evaluation of efficacy to continue or extend the use of the treatment or medication.
When you submit multiple PAR types for the same patient, the PAR type for the Statement of Medical Necessity that you are adding will show at the top and left side of the page.
This example shows PAR: MTG Confirmation.
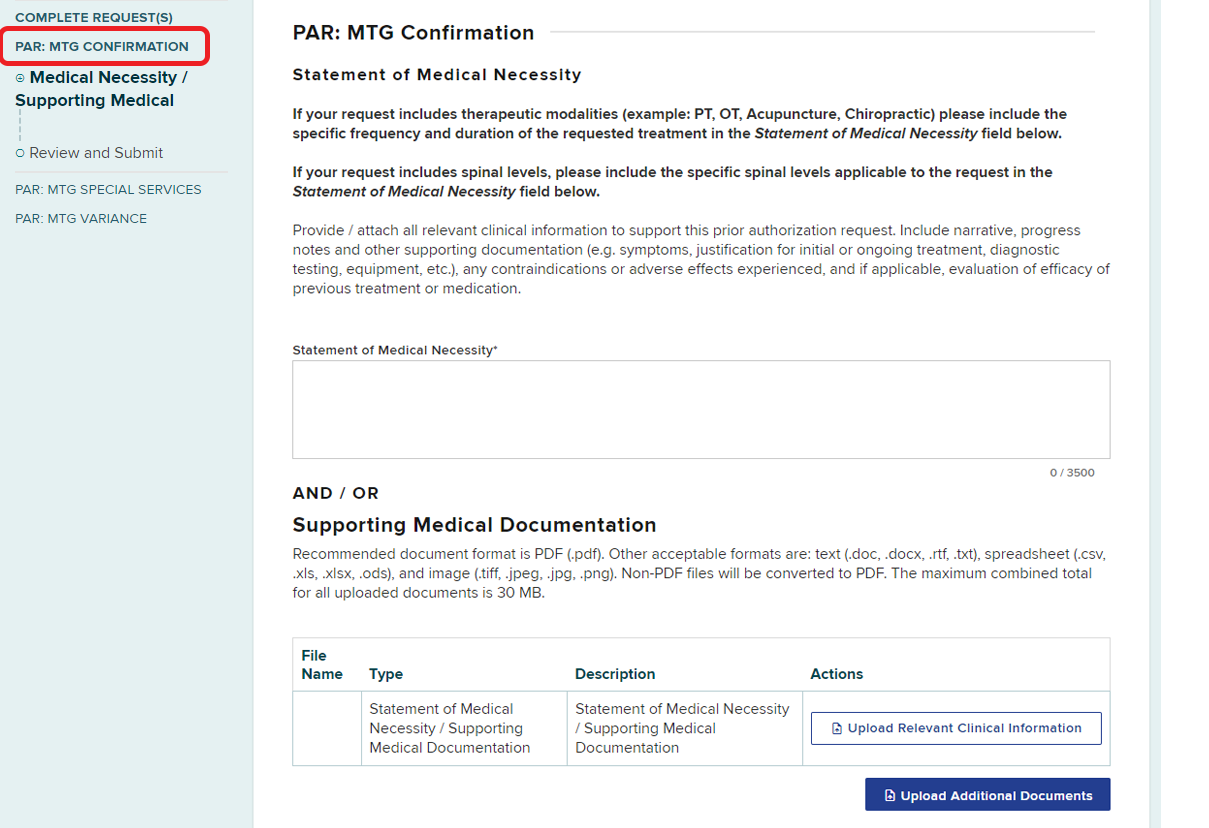
Enter or upload the Statement of Medical Necessity and any other supporting documents.
To upload a document, select Upload Relevant Clinical Information.
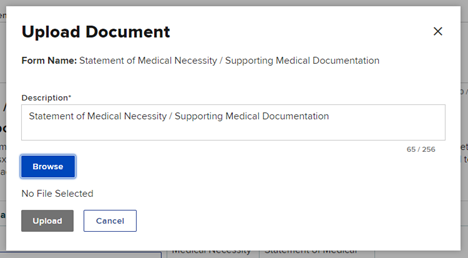
Select Browse to locate the document on your computer, and then enter a description of the document, if necessary. Select the Upload button to upload the document.
You should receive a confirmation that the document was uploaded successfully. If there are more documents to add to your request, select Upload Additional Documents.
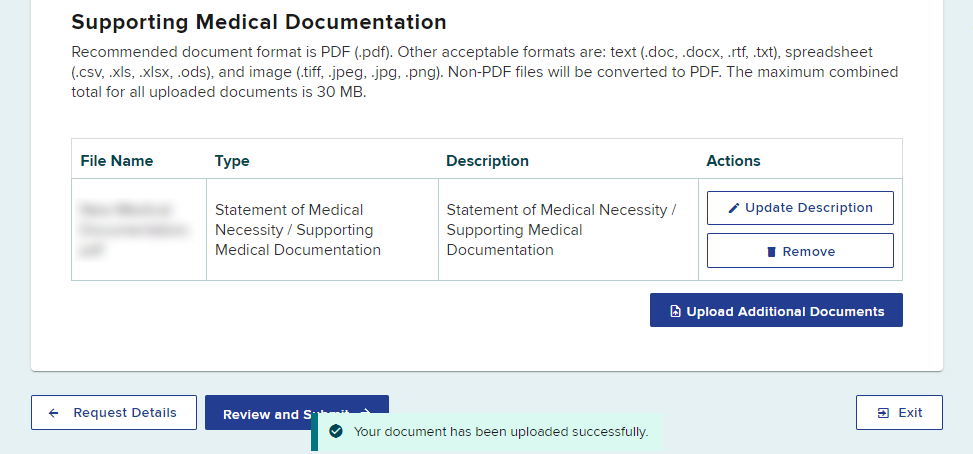
Select the Review and Submit button.
Review and Submit
Review all details for the MTG Confirmation. Select the Preview button to view your PAR as a generated document.
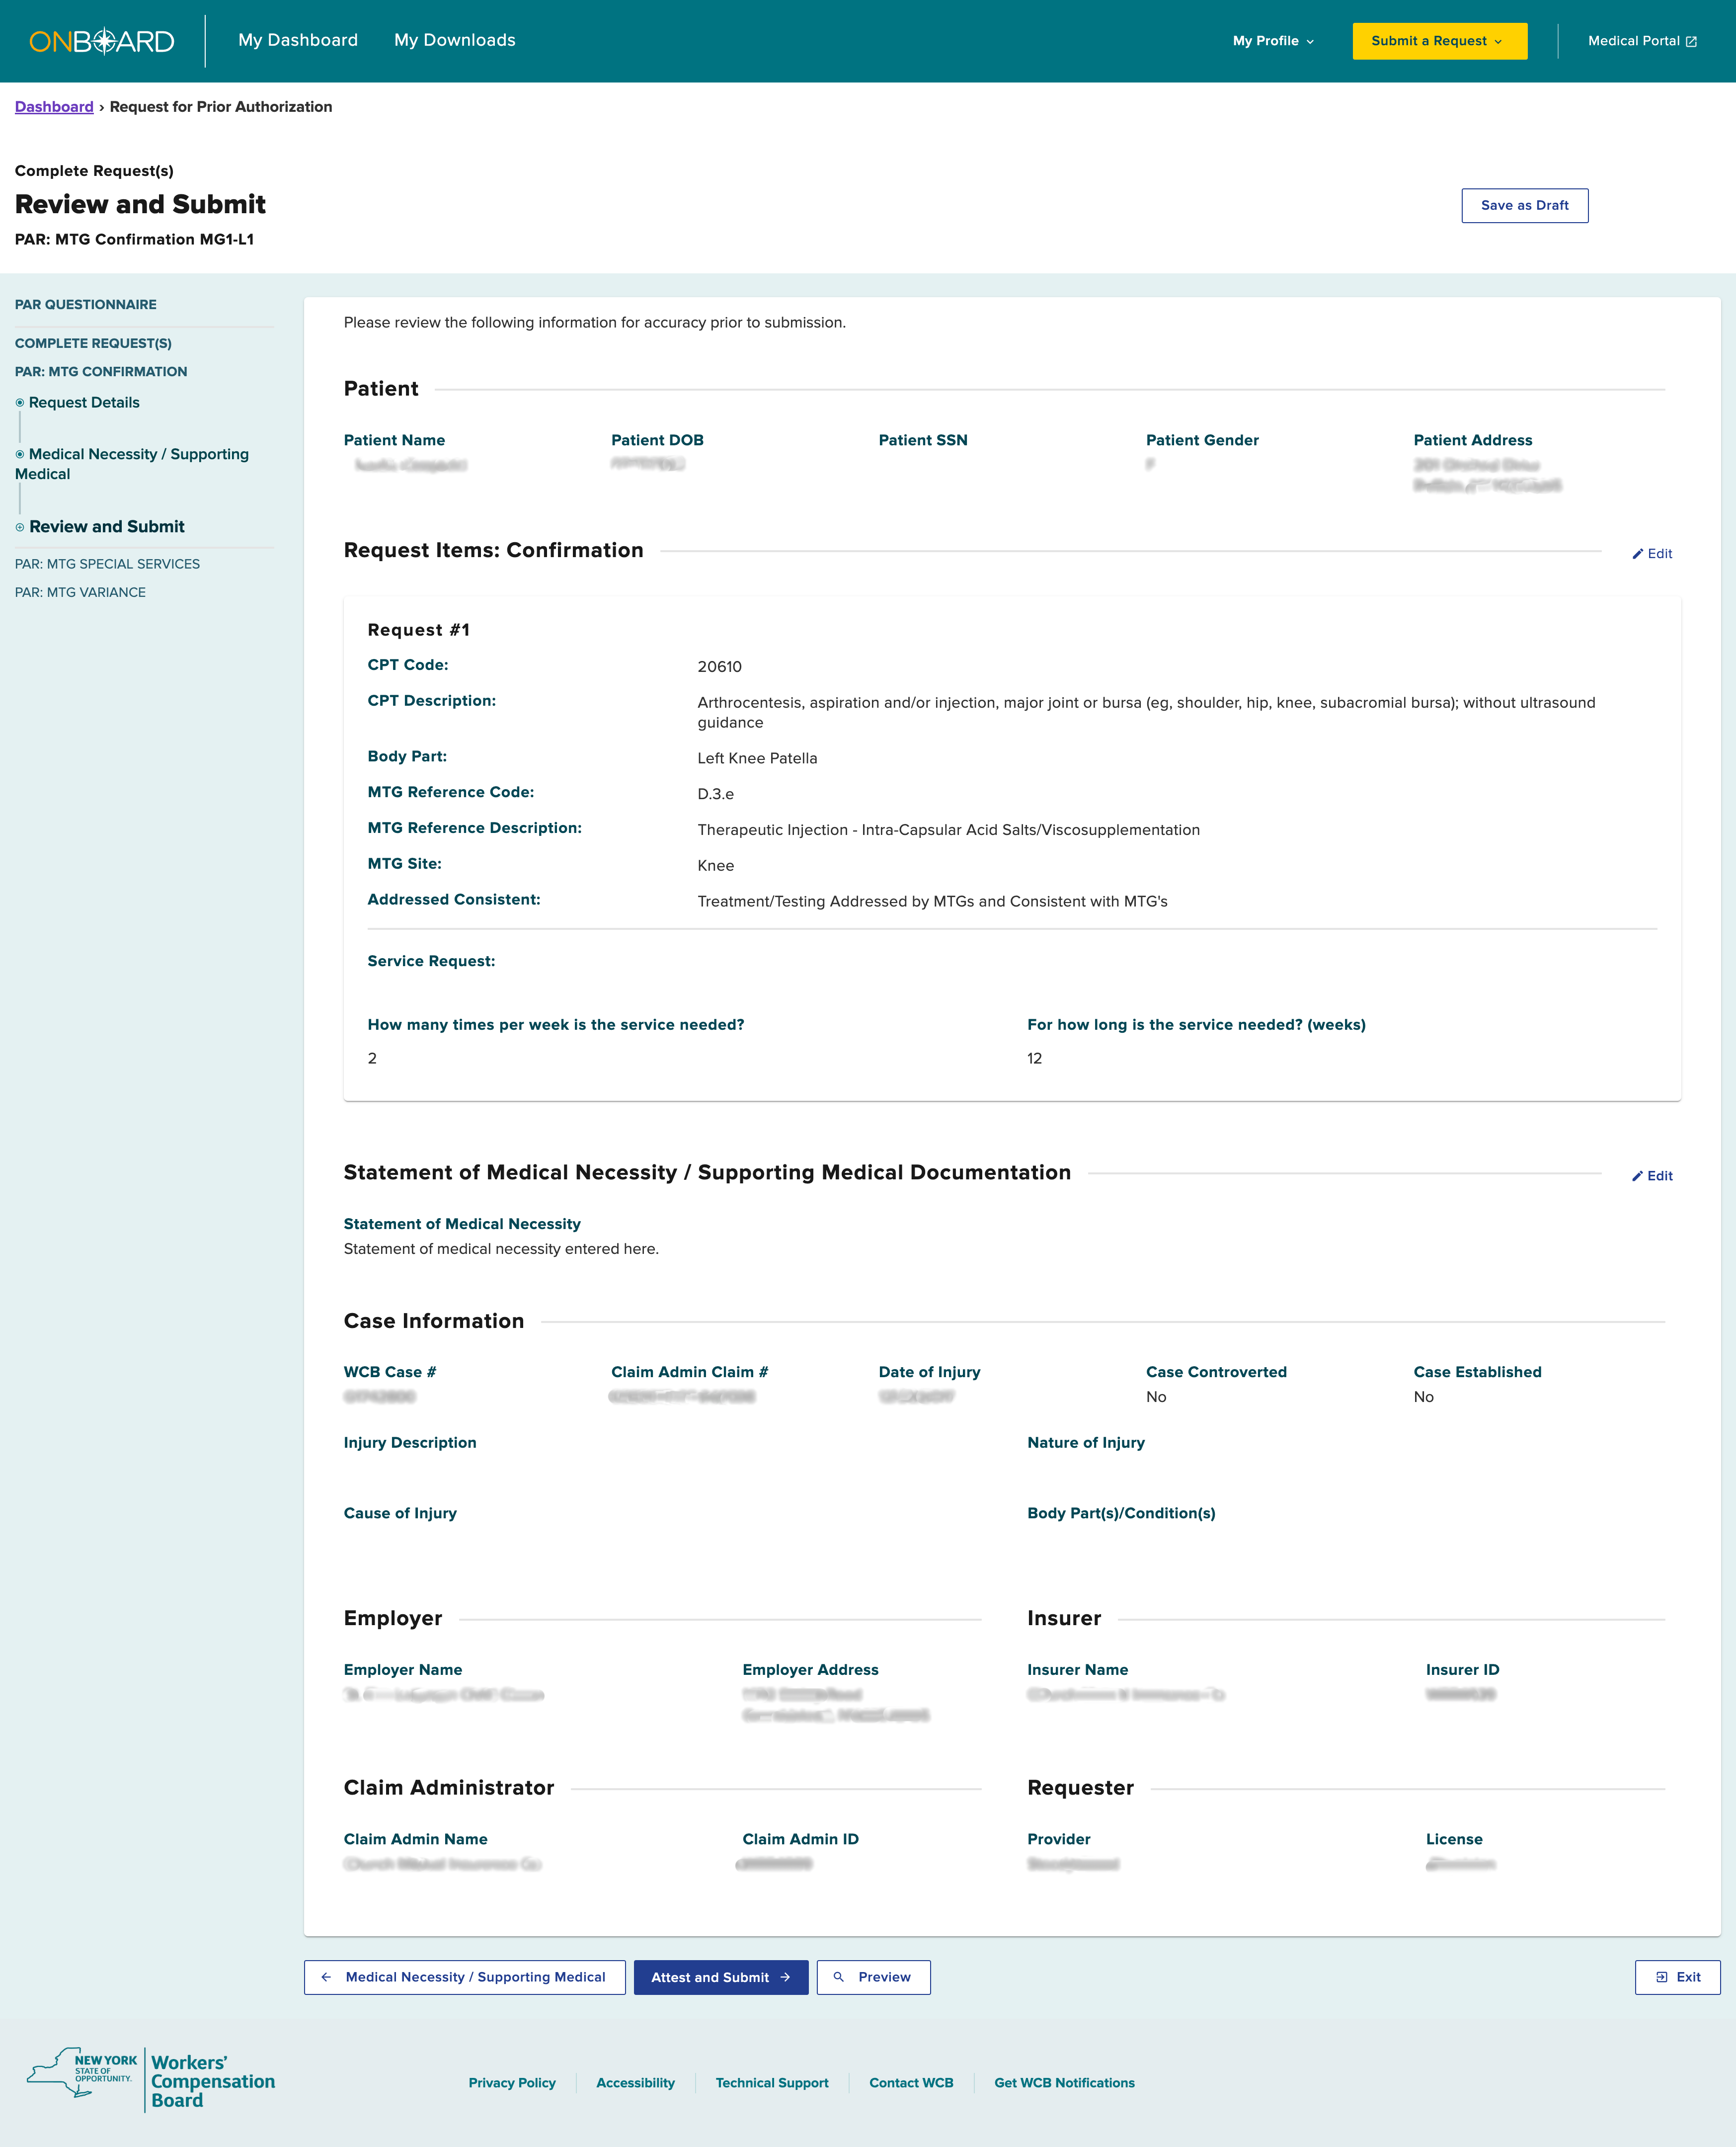
Once confirmed, the PAR is ready to be submitted.
Processing Multiple PAR types
If more than one PAR type was requested, you will be presented with the next PAR type to complete the details for that PAR. You can see your progress in the column on the left. Follow the same procedure of adding or attaching the Statement of Medical Necessity, reviewing, attesting and submitting. Each PAR will appear as a separate entry in the Draft eForms queue for both the delegated user and the provider.
The example below shows that the MTG Confirmation is finished, and the next step is to add the Statement of Medical Necessity for the MTG Special Services request.
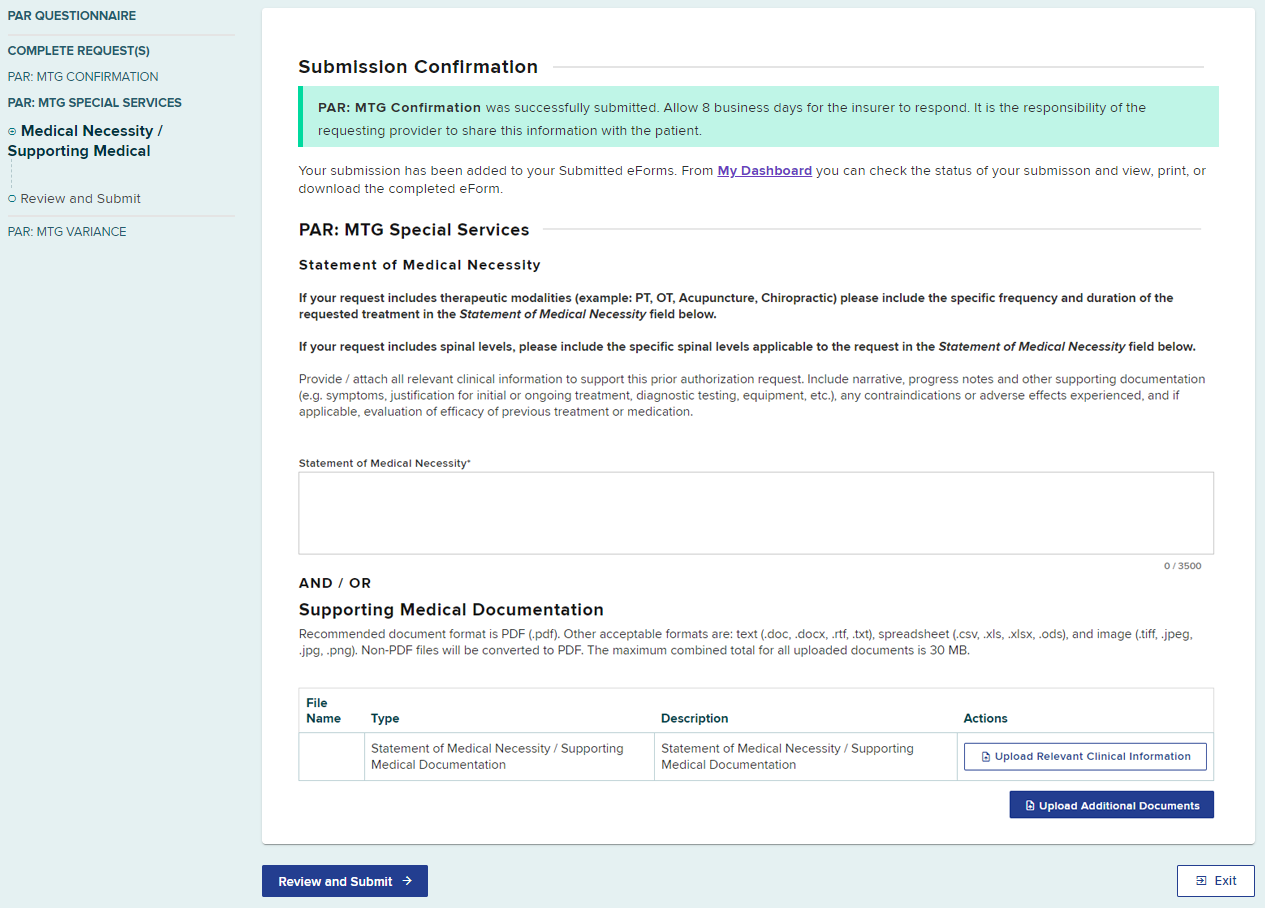
Enter or upload a document for the Statement of Medical Necessity, review the information and then select the Ready to Submit button to finish the MTG Special Services PAR. After submission of the MTG Special Services PAR, you will be prompted to complete the next PAR type you requested.
Multiple Requests of the Same PAR Type
When a single submission contains multiple requests of the same PAR type, they will be grouped together as one PAR submission, unless it is a request for multiple types of medication, which are submitted as separate PARs.
In this example, we previously entered two MTG Variance requests.
Enter or upload a document for the Statement of Medical Necessity for both MTG Variance requests and select the Ready to Submit button.
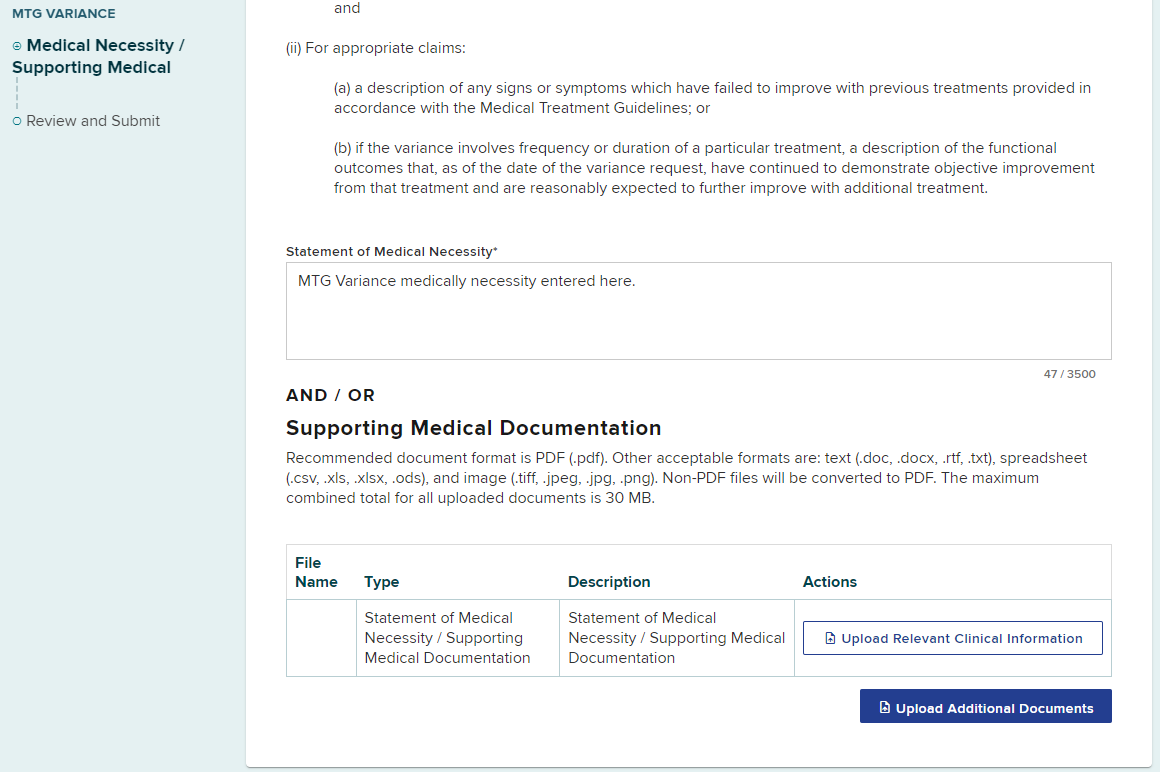
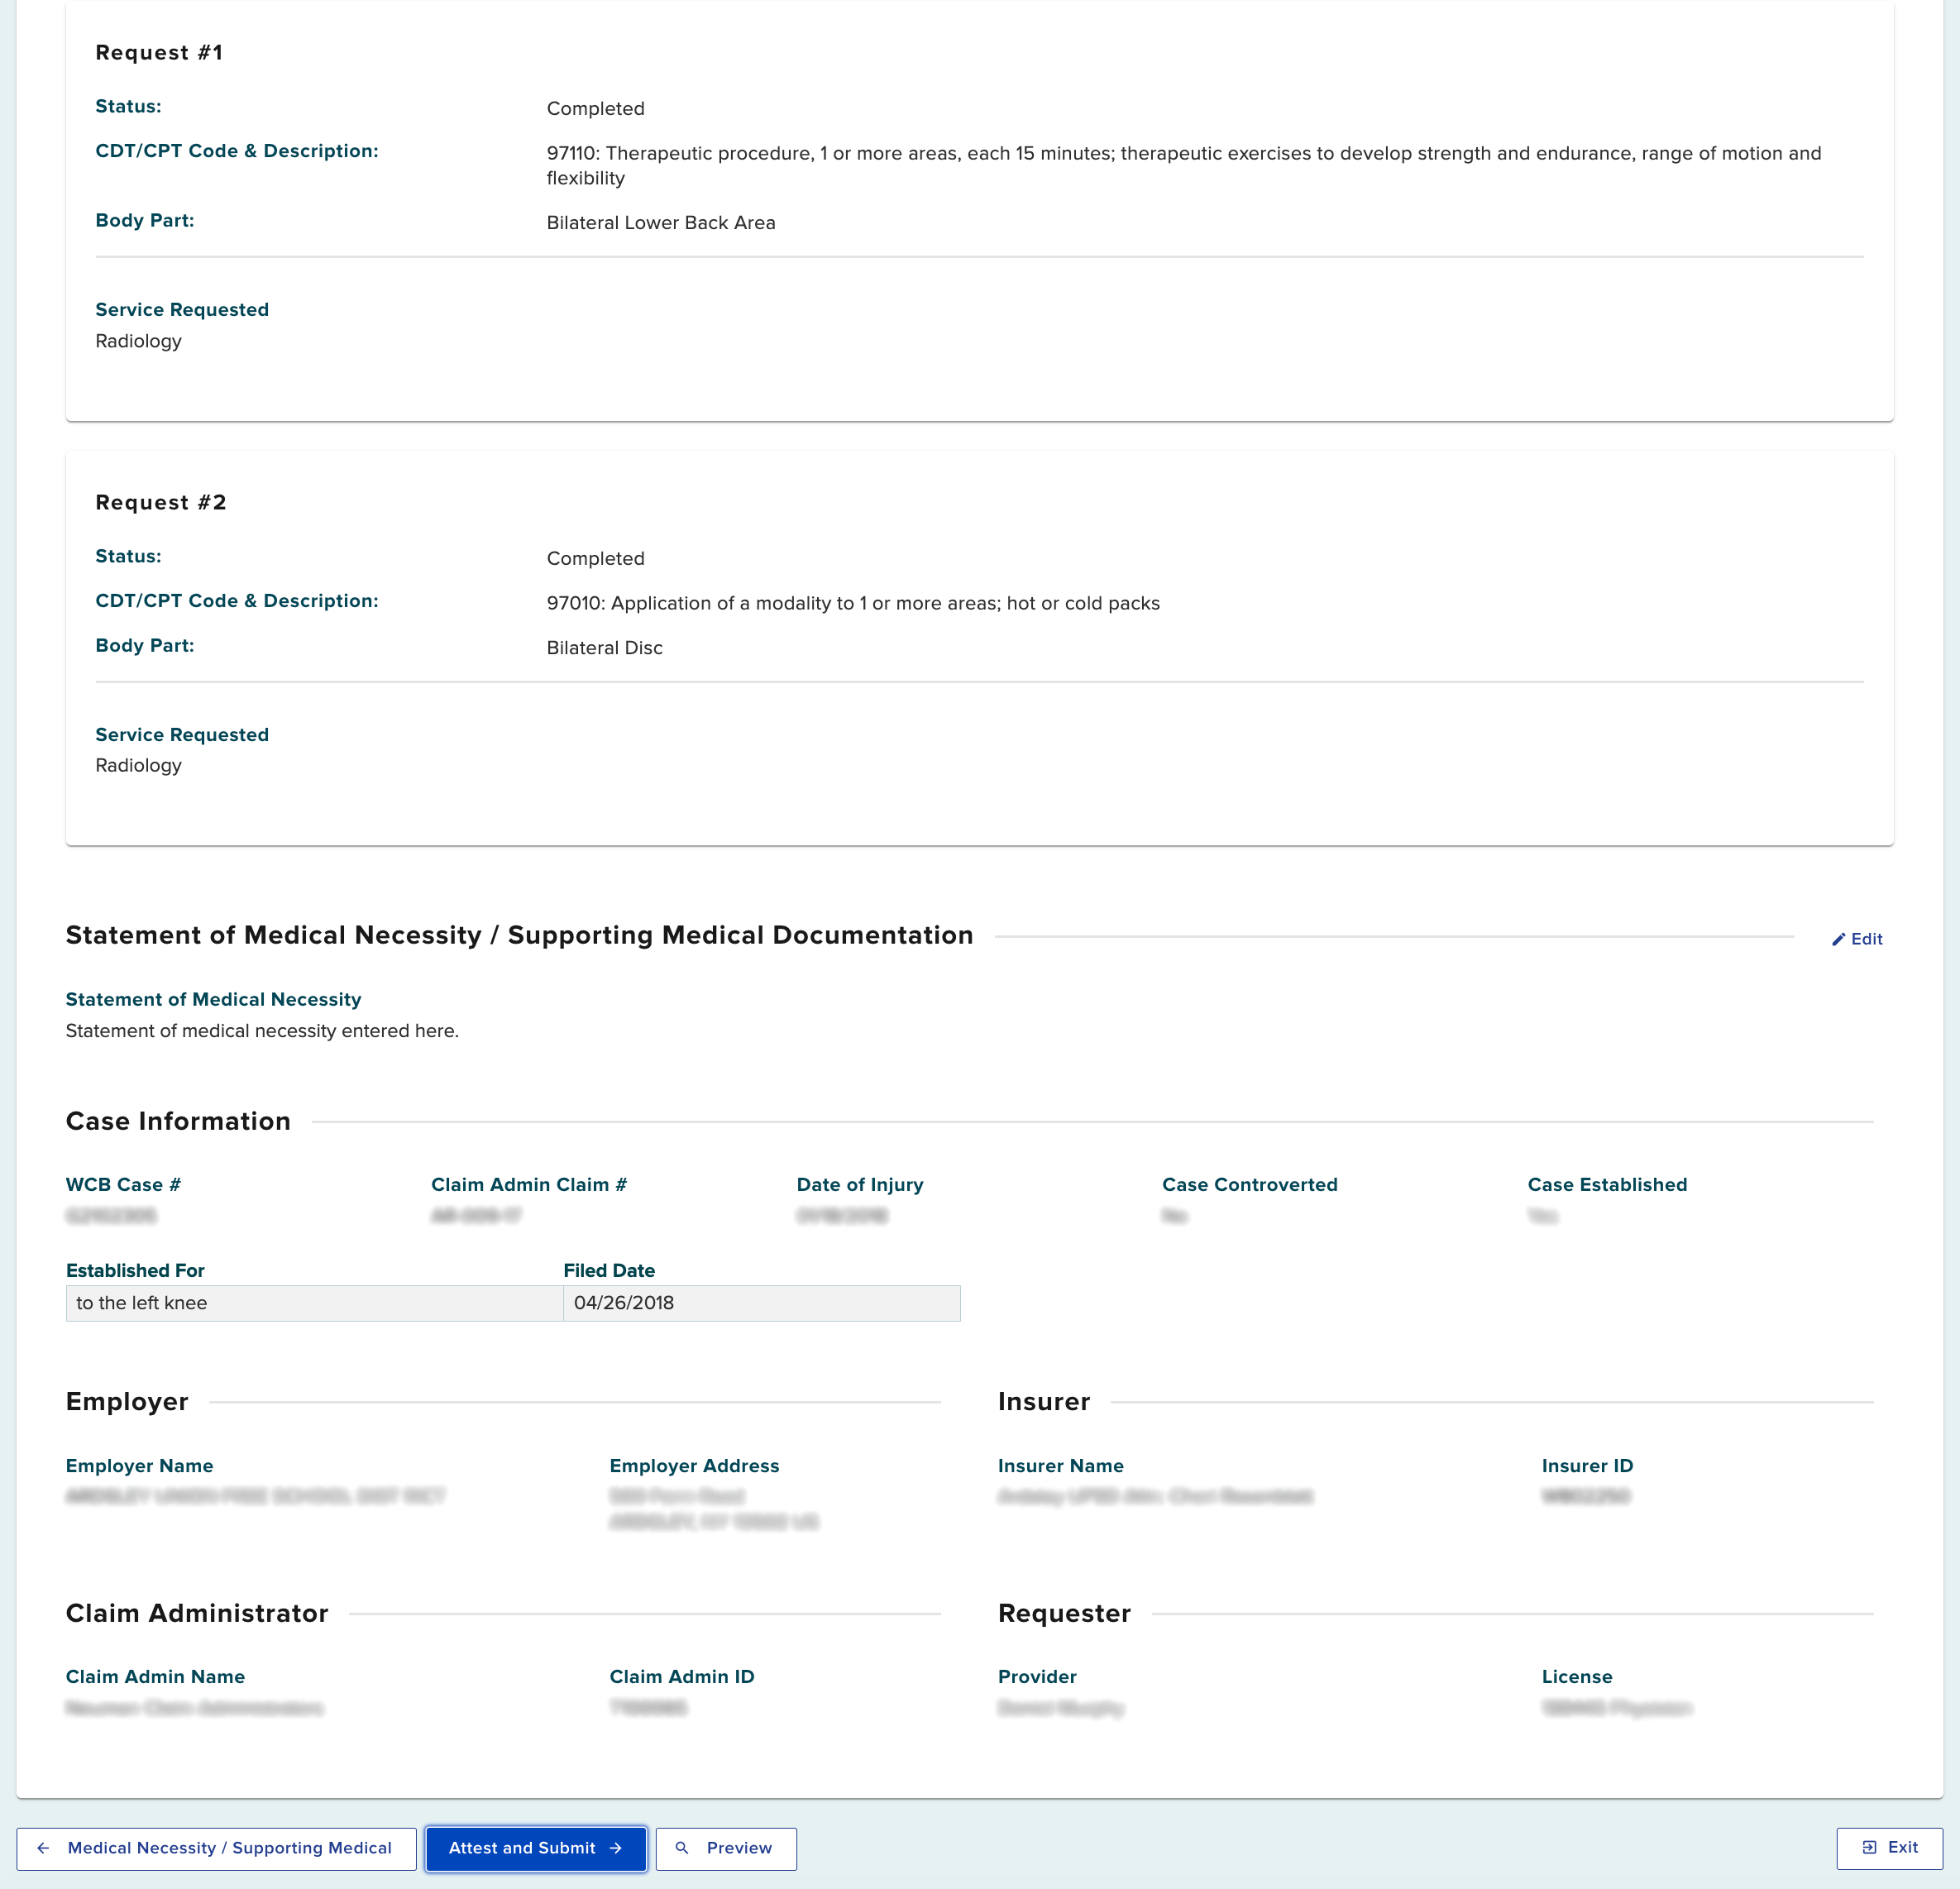
In this example, it shows both of the MTG Variance requests ready to be submitted as a single PAR. Review the details and select Attest and Submit.
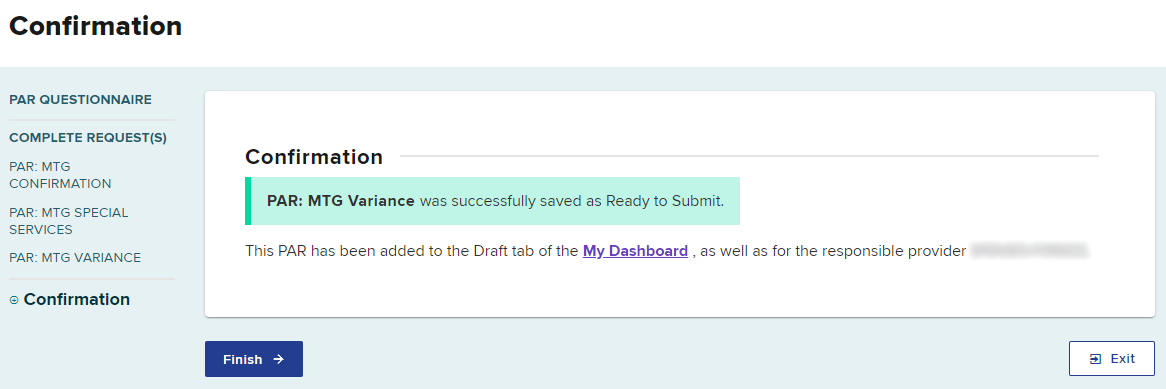
Select Finish when done submitting all PARs.
Submission of PAR by Health Care Provider or Delegate
If you are ready to submit the PAR, select the Attest and Submit button.
You are required to understand all aspects of the attestation presented to you before submitting a PAR. Read the Attestation and Submission carefully, and then select Submit.
If you are a delegated user drafting the PAR on behalf of a health care provider who wants to review the PAR before submission, select the Save as Draft button. The health care provider can complete the process by signing and submitting the PAR. Drafted eForms will be automatically removed from the system after 30 days if they are not submitted.

A submission confirmation will appear after the PAR has been submitted which includes the time frame for an expected response.

Select Finish when done.

For this example, we will select the MTG Variance PAR that is ready to submit.

Review all of the details for the PAR request. The provider may change the Request Details and Statement of Medical Necessity or upload different/additional documents, if necessary, before selecting the Attest and Submit button.
Dashboard
After the PAR is submitted, the PAR for both the delegated user and the provider will be in the Submitted eForms tab and the Prior Auth > Active tab.
Prior Auth > Active Tab
Within your dashboard, you can view the recently submitted item in the Prior Auth > Active tab. The Due Date column will update with the date the claim administrator is required to respond. All time frames for claim administrator review and response are automatically tracked by the system. If the claim administrator does not respond within the designated time frame, an Order of the Chair may be issued.
The Current Activity tab will show the level of review of the request. An initial submission will be "Insurer Level 1 Review."

Submitted eForms Tab
The Submitted eForms tab of your dashboard, shows all PARs that have been submitted to the claim administrator for review.
The Submitted eForms tab shows the submitted MTG Confirmation, MTG Special Services and MTG Variances PARs. There is only one MTG Variance PAR because the two MTG Variance requests were grouped together into a single PAR.
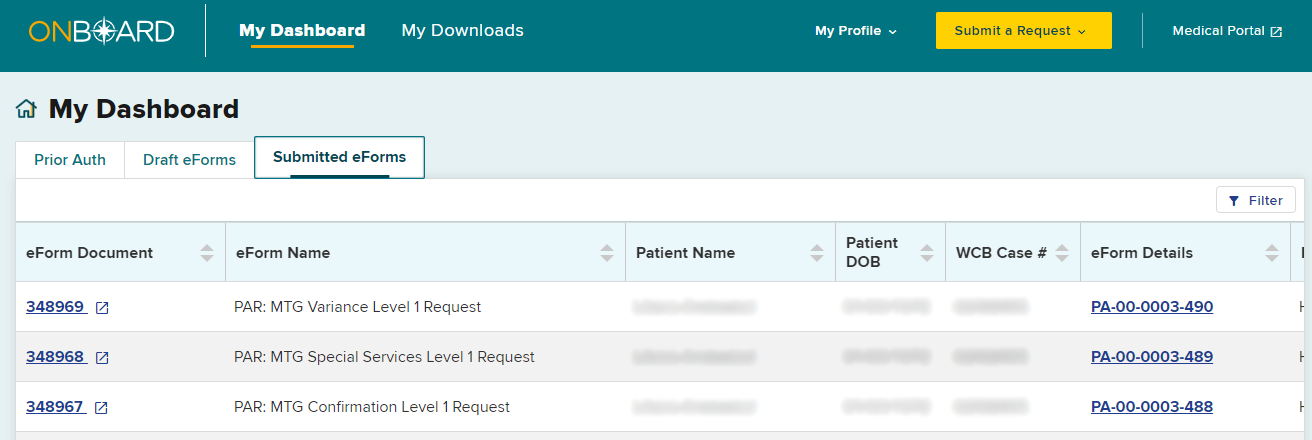
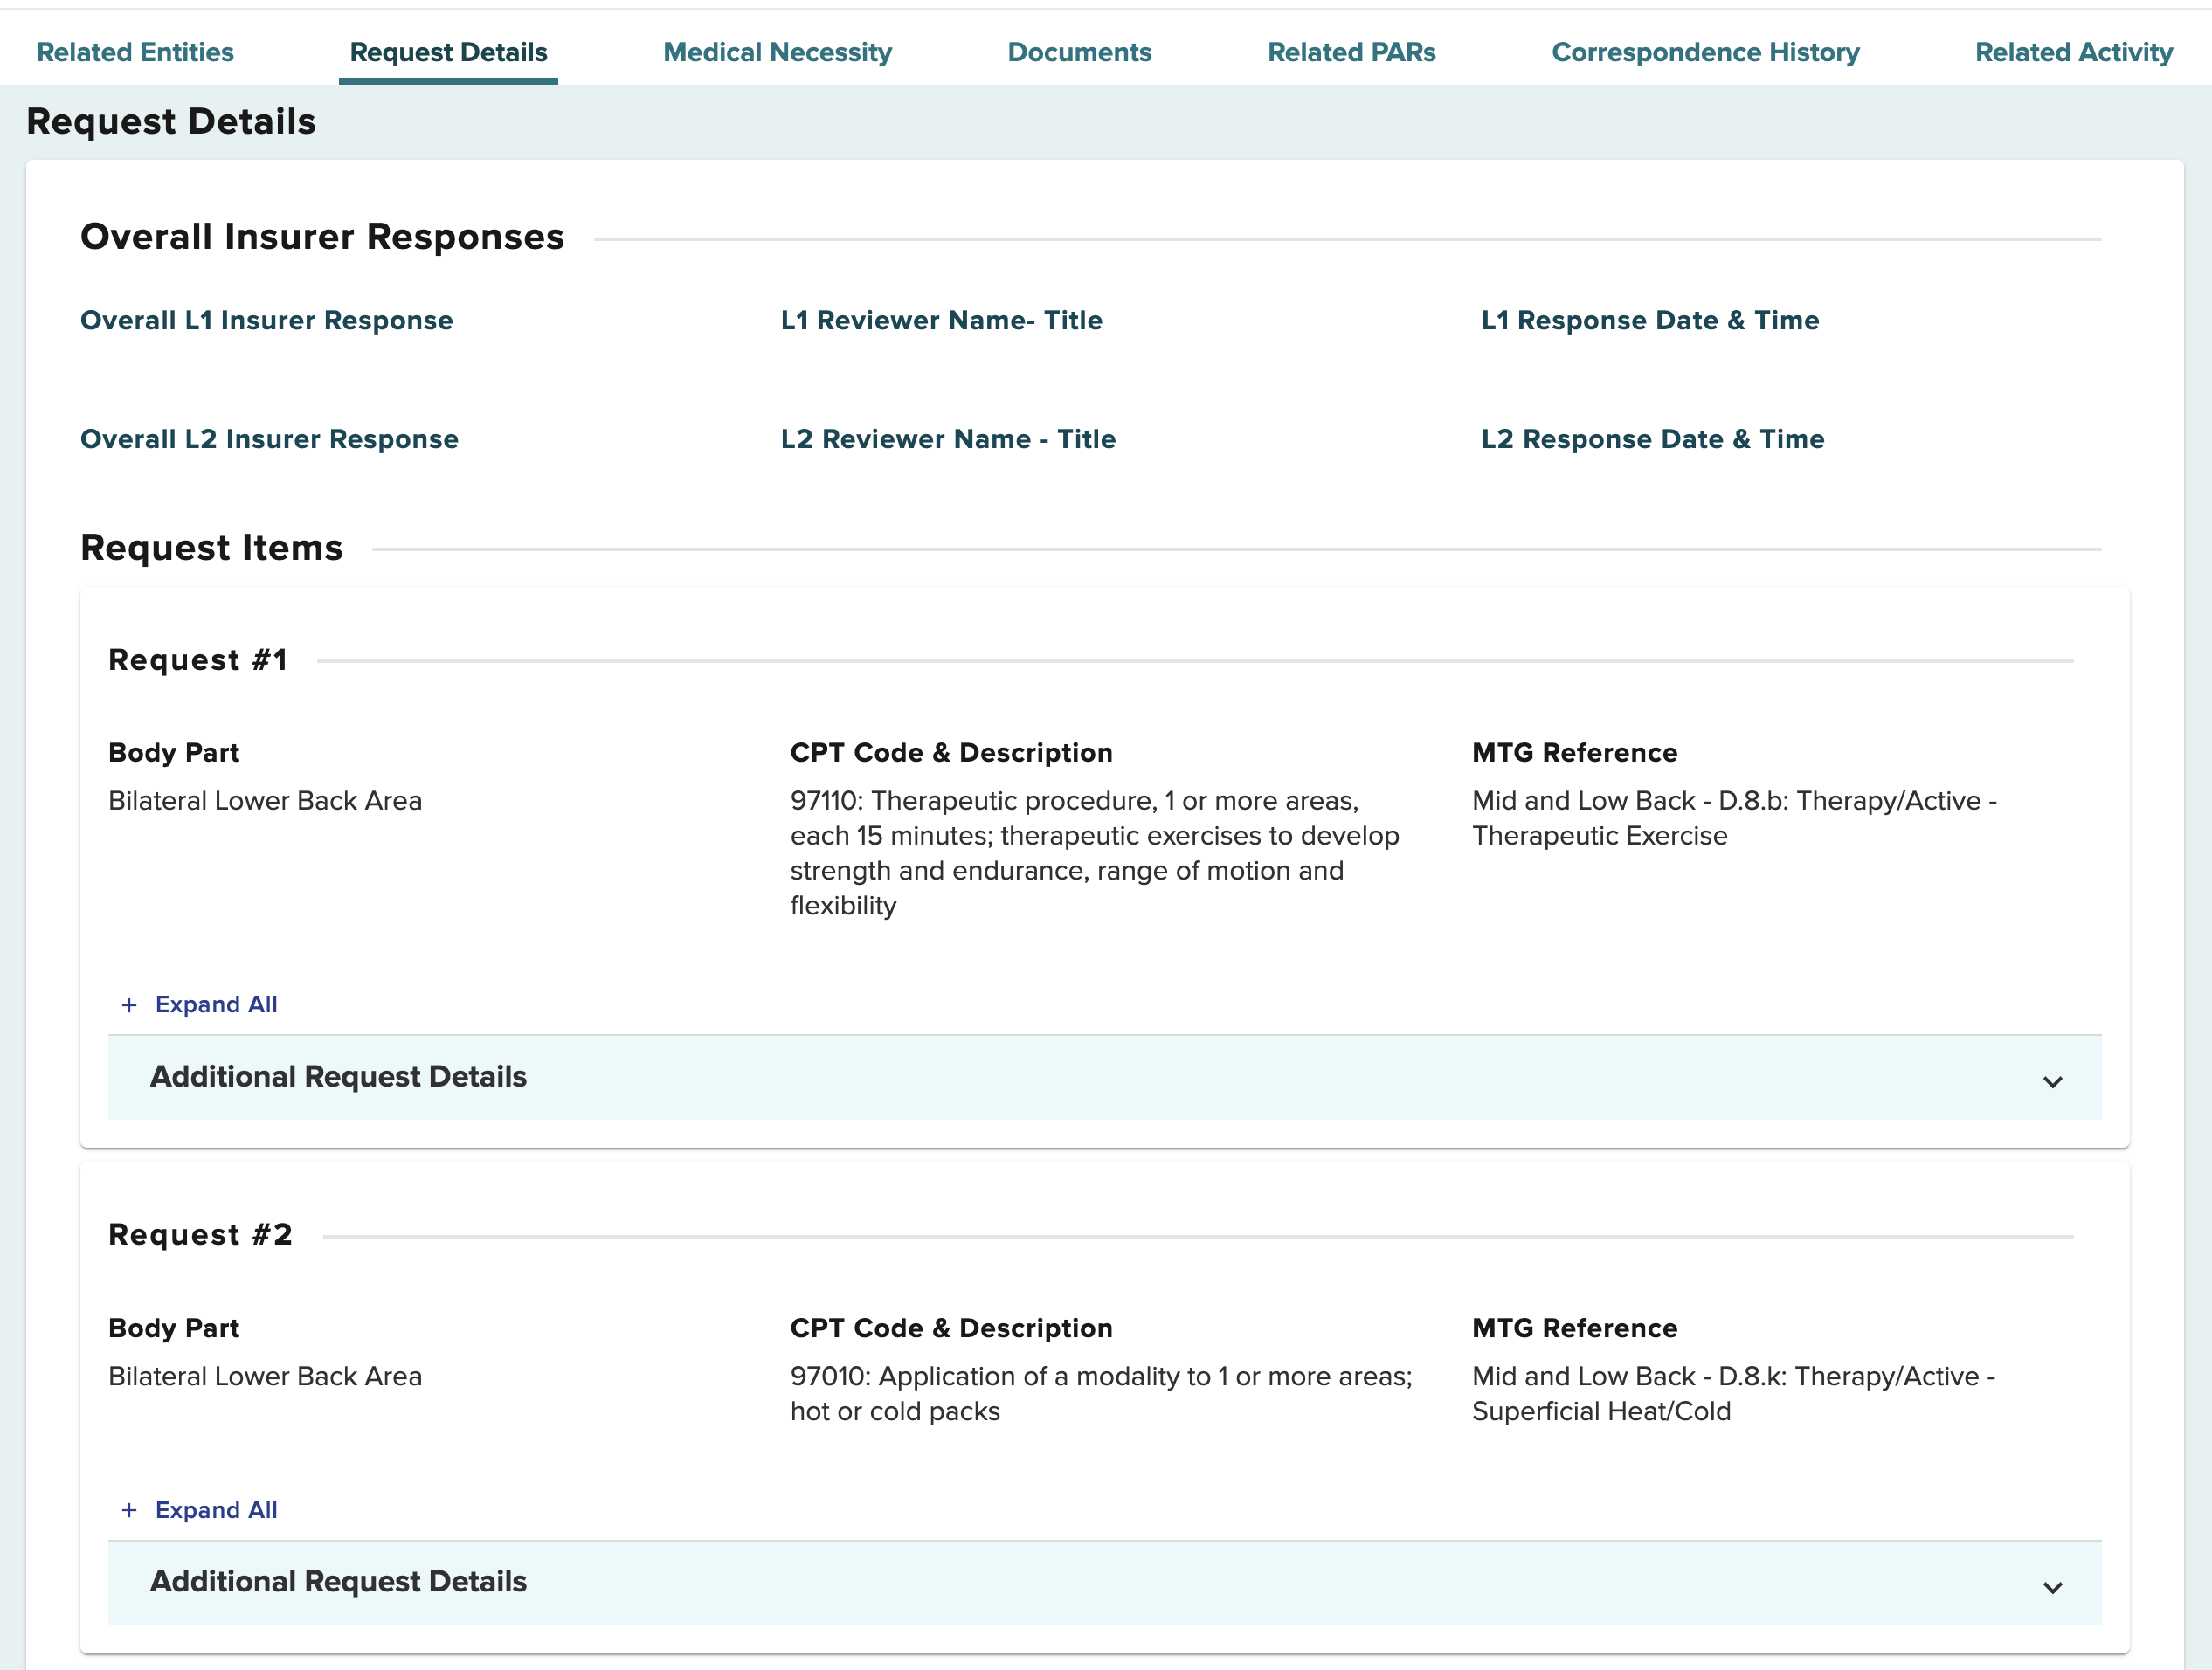
To view the MTG Variance submissions, select the PAR ID under the eForm Details. On the PAR details page, Request Details will show both MTG Variance requests.
Resolved tab
When a final determination is made on a PAR, it will be moved to the Resolved queue. When a PAR contains multiple requests, it will reach final determination once all request items in the PAR have reached a final determination. For example, if one MTG Variance is granted and the other MTG Variance is denied at the Level 1 review, both requests will move to Level 2 review and if escalated by the health care provider, to Level 3 review (Board's Medical Director's Office) together. Once all requests within the PAR have received a final determination, the PAR will moved to the Resolved tab of the health care provider's dashboard. It is recommended to check your Resolved tab for final decisions daily.
Insurer Response
When the claim administrator's reviewer responds to your request:
- The Active tab on the dashboard will update with the new information and show in bold letters.
- The provider and any delegates will get an email or text message, based on their notification preferences in the OnBoard user's profile, advising that action was taken on their request.
- If the claim administrator needs more information to respond to the request, they may send a request for further information.
- The claim administrator may require that an Independent Medical Exam (IME) be conducted before it responds. An IME Requested Notification will be sent to the provider in OnBoard. The timeframe for the claim administrator to respond will automatically be extended from 15 days to 30 days.
- If the PAR was granted by the claim administrator, or the Board's Medical Director's Office issues a Notice of Decision, the PAR will appear on the Resolved tab. It is recommended that the Resolved tab be checked at least daily for final decisions made on PARs.
- If any other action is taken on a PAR, it will remain on the Active tab and the Current Activity column will show the current status.

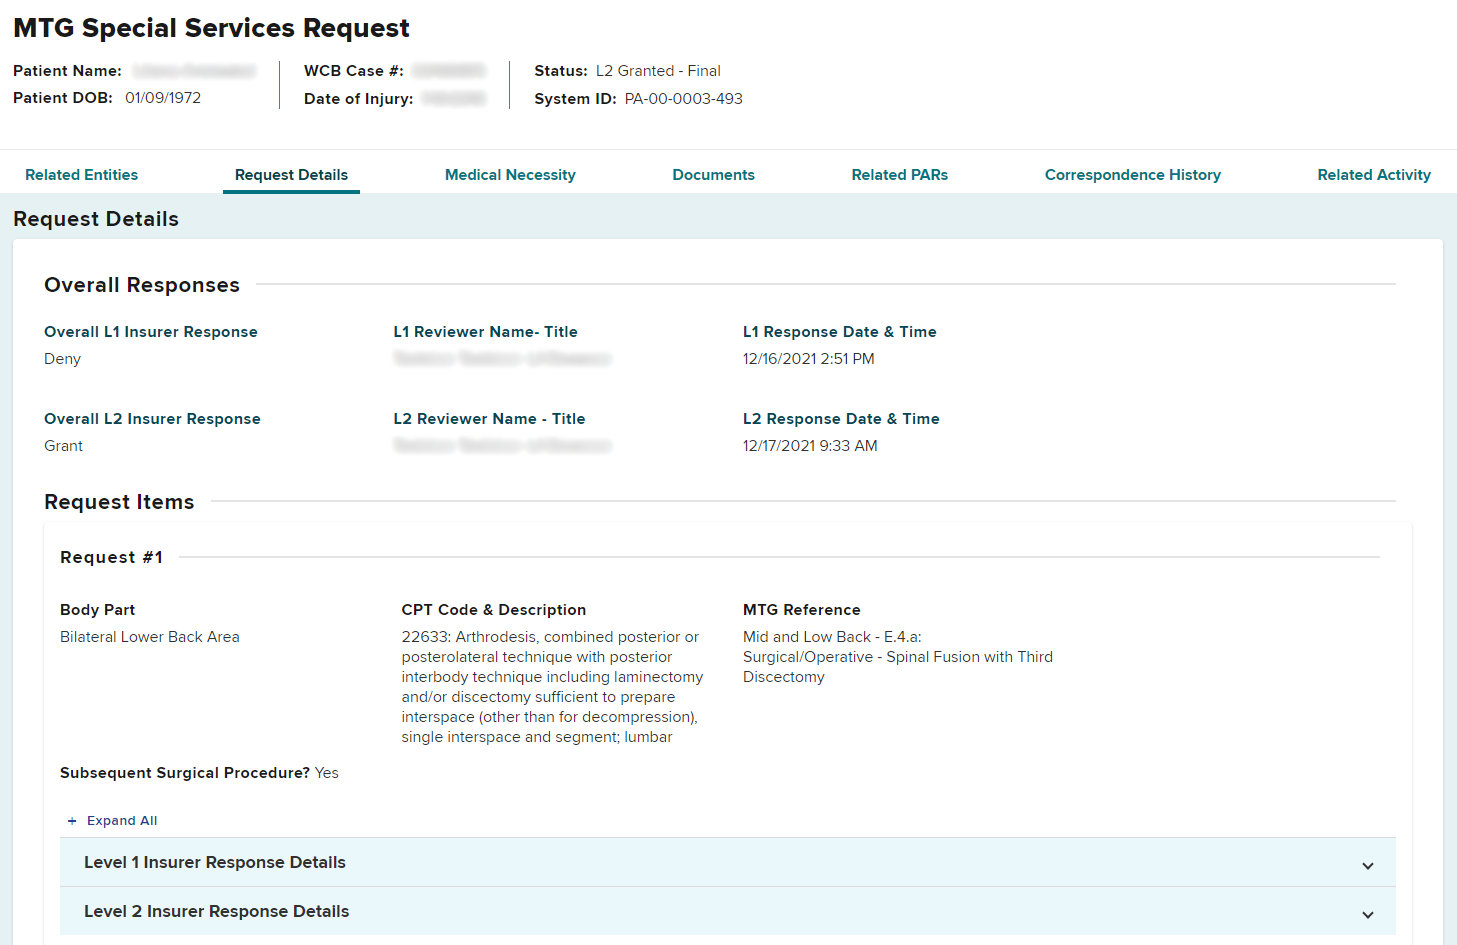
To review the response from the insurer, select the PAR ID link to access the PAR Details page. In the Request Details section on the PAR Details page, select the Level 1 or Level 2 Insurer Response Details as appropriate.
PARs Escalated to Level 2 Review
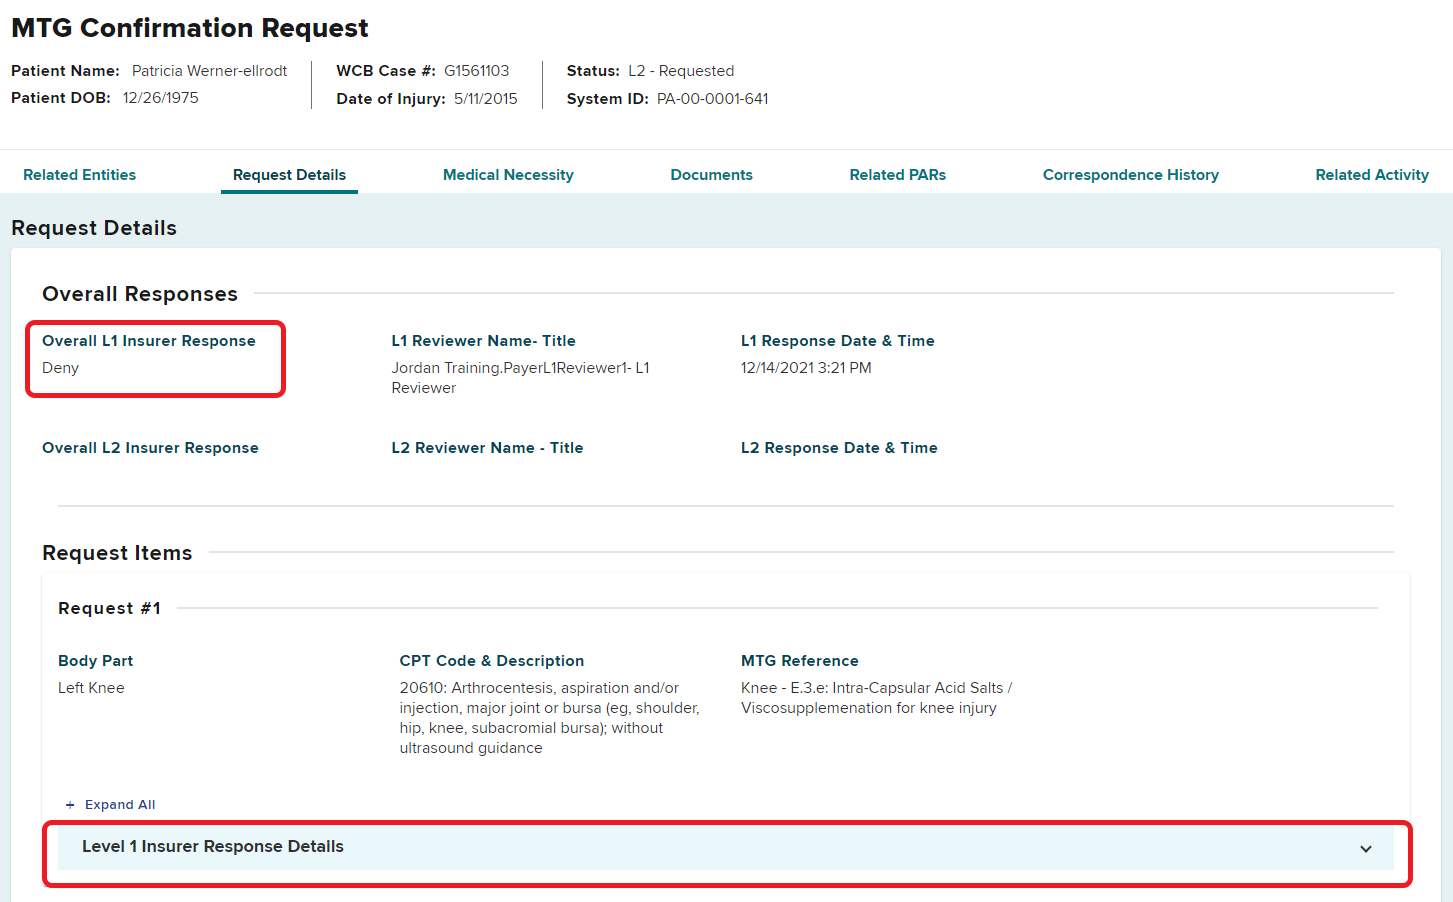
PARs that are granted in part or denied at the Level 1 review for medical reasons will be automatically escalated to a Level 2 review.
The Current Activity column on the Active tab will show Insurer Level 2 Review, indicating the PAR has been automatically escalated. This review must be done by the claim administrator within the required time frame, shown in the Due Date column.

To view the claim administrator's Level 1 response, select the PAR ID link, navigate to the Request Details section, and select the Level 1 Insurer Response Details drop-down panel to view the full response details.

If a Level 2 reviewer grants the request, it will appear in the Resolved tab.
Escalating Treatment/Testing to Level 3 Review
Treatment/Testing PARs that are granted in part or denied for medical reasons at the Level 2 review will not be automatically escalated for Level 3 review by the Board.
- MTG PARs can be escalated by the health care provider in OnBoard and the Medical Director’s Office (MDO) will issue a Notice of Resolution.
- Non-MTG Under or = $1,000 PARs can be escalated by the health care provider in OnBoard, but will be resolved through the adjudication process.
- Disagreement over the claim administrator’s decision on Non-MTG Over $1,000 PARs are resolved through the adjudication process.
After a Level 2 reviewer has submitted their denial or grant in part, the PAR row will update, in bold, on the Active tab. The Current Activity column will show the latest response. Escalating to a Level 3 review needs to be completed within the required time frame indicated in the Due Date column.
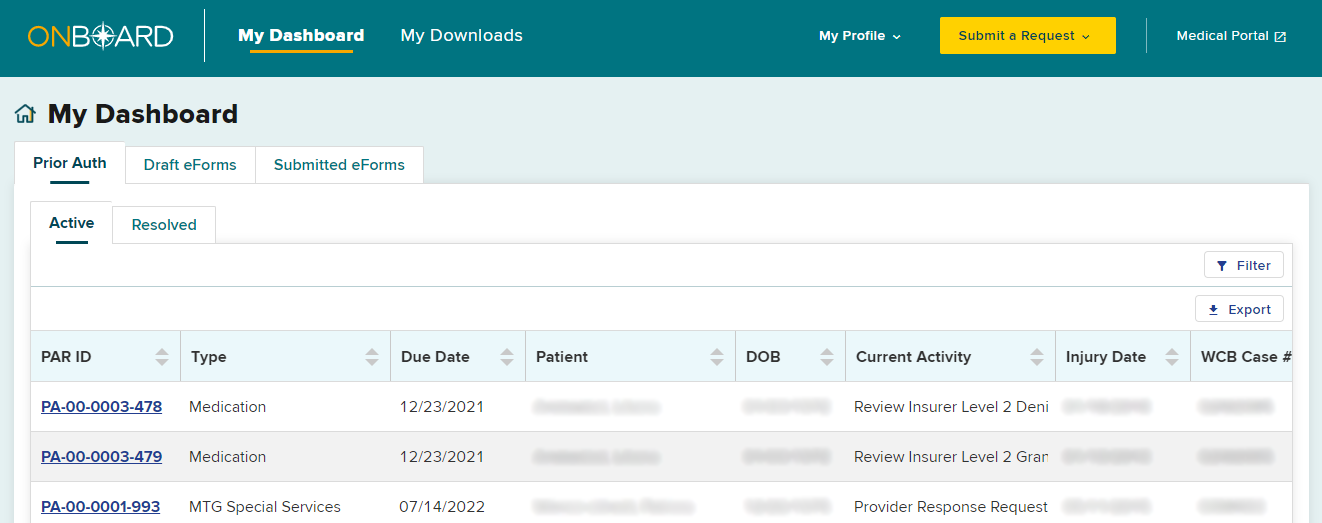
In the example below, the Current Activity is Review Insurer Level 2 Denial and may be escalated for Level 3 review by 12/27/2021.
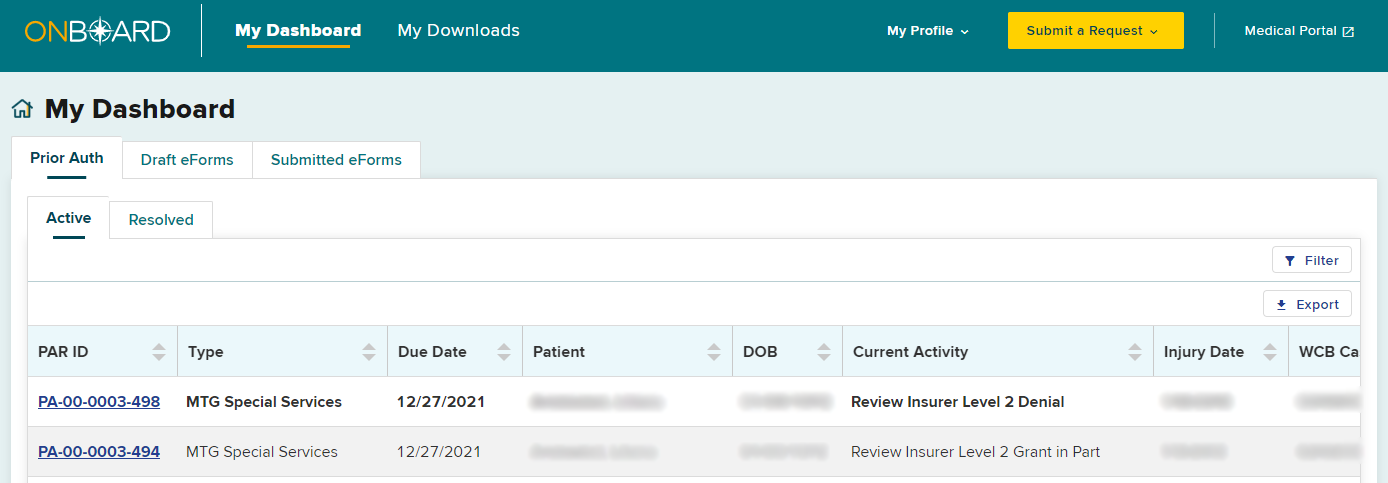
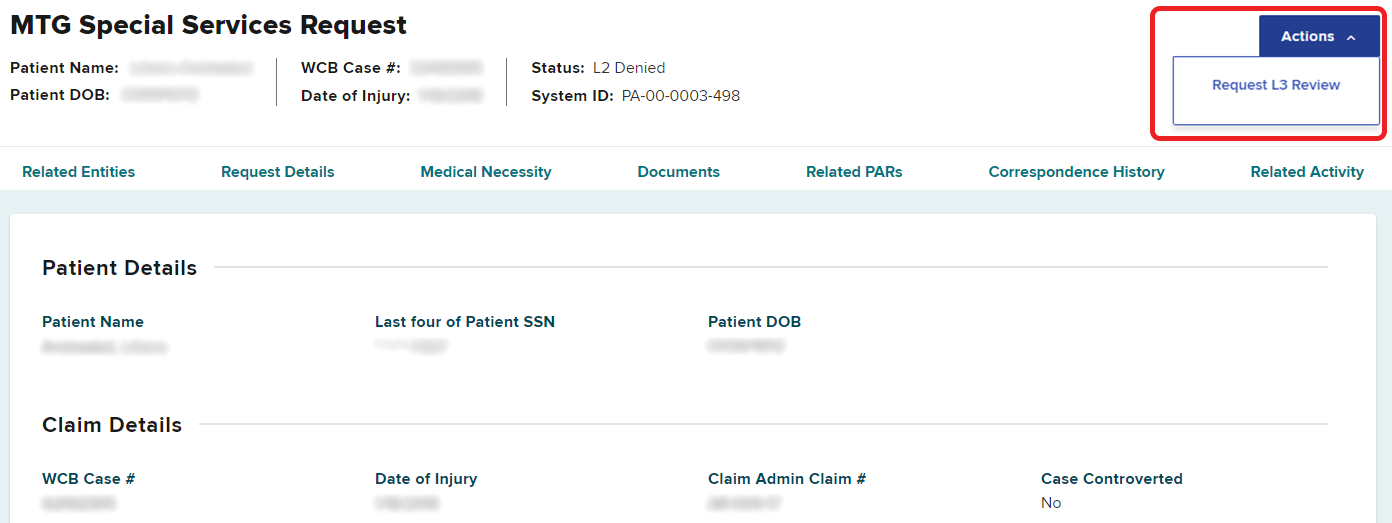
To escalate to Level 3 review, select the PAR ID in that item’s row. Select the Actions button on the top right of the PAR Details page and select Request L3 Review.
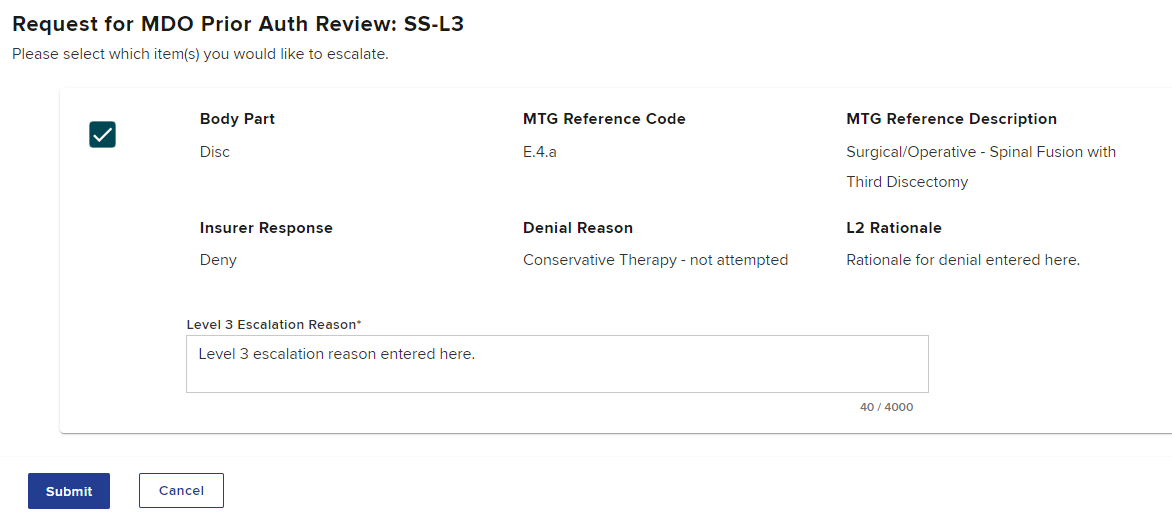
Select the item(s) you would like to escalate, enter the reason for the Level 3 escalation in the text box, and select Submit.
You will receive a confirmation that the escalation to a Level 3 review has been submitted.
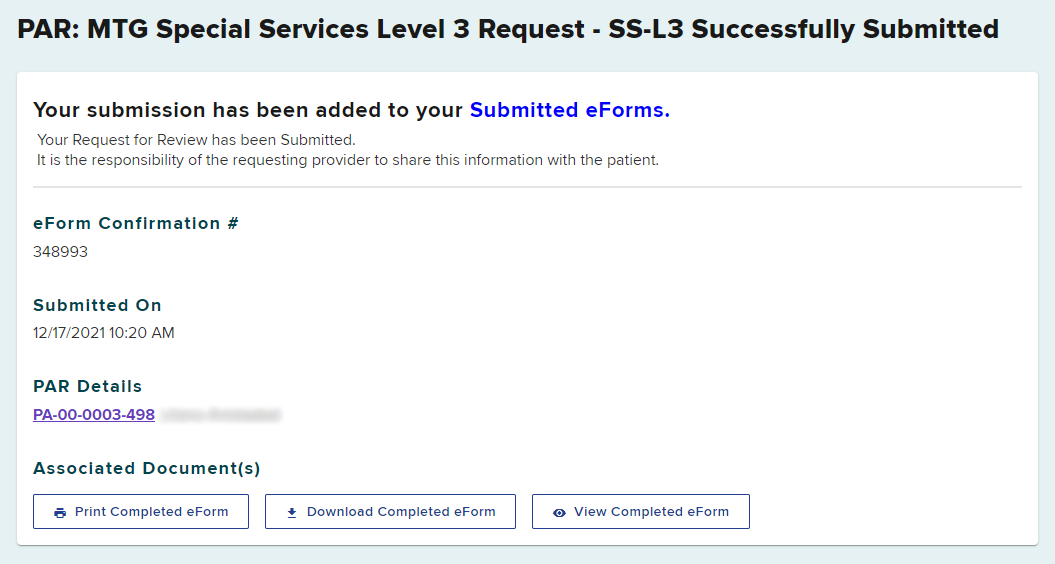
The escalation to Level 3 will now appear in your Submitted eForms tab. The eForm Name will show the PAR type and the level of request. The Status column clarifies that the escalation is complete.

Level 3 Response
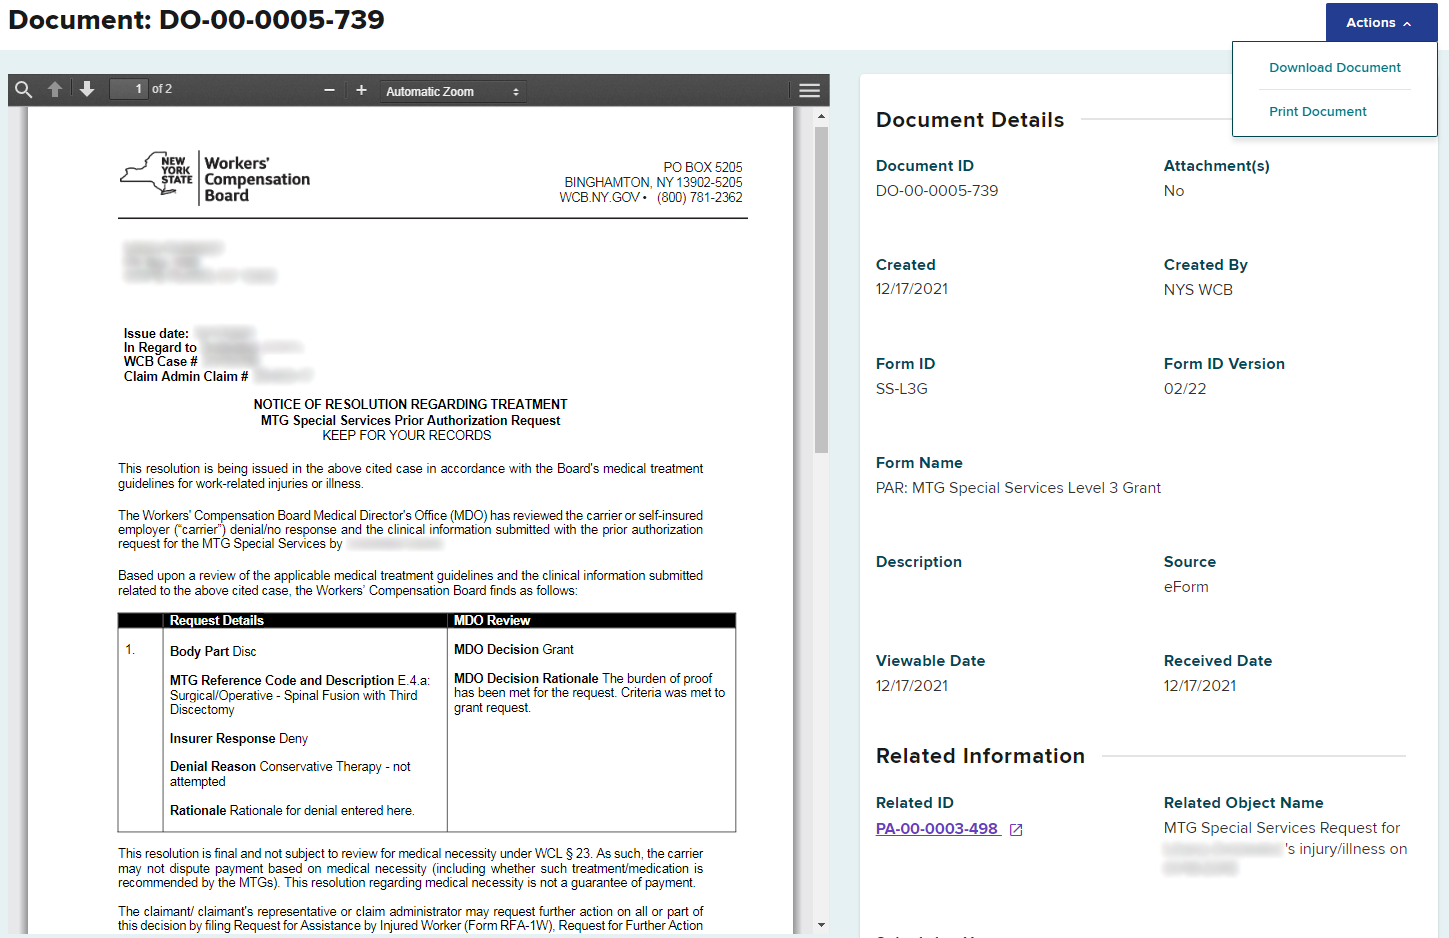
When the Board’s MDO makes a decision regarding your request, you will receive a Notice of Resolution. The determination by the MDO for medical necessity of MTG-related procedures, DME or medication requests are final.
The PAR will be moved from the Prior Auth > Active tab to the Resolved tab, and will no longer appear in the Active tab. It is recommended to check your Resolved tab for final decisions daily.

Selecting the PAR ID link will open the PAR Details page. You will be able to view, download or print the Notice of Resolution from the Documents section on this page.
